If you’re looking for a quick, budget-friendly way to dress up your table, making your own napkin rings might be just what you need.
You can craft charming rings with simple materials like wood, string, beads, and ribbon—things you probably already have at home. With a little glue and some creativity, you’ll have unique pieces that add a personal touch to your table setting.
The best part? They dry fast and are easy to customize.
Keep reading to see how you can create these lovely napkin accessories step by step.
Gather Your Napkin Ring Materials
To gather your napkin ring materials, start with a sturdy base to ensure durability. Options include wooden rings or binder rings, both offering stronger support compared to cardboard tubes. Wire bases provide flexibility, allowing you to shape and customize easily, while cork or faux leather suits a wrap-style ring for a refined look. Choose a covering material that matches your desired style. Jute twine adds a rustic charm, perfect for a casual or country theme. Ribbon or burlap can elevate the formality, bringing elegance to your table setting. Select adhesives based on your build: hot glue works fast, fabric glue is ideal for cloth coverings, and E6000 provides a strong, permanent bond for mixed materials. Early color coordination simplifies the process. Acrylic or metallic paints give you control over your color scheme, enabling precise matching to your table decor. Alternatively, pre-colored beads, buttons, or shells offer instant harmony without additional painting. Match your color palette to the overall table setting—earthy tones for rustic themes or jewel tones for an upscale, elegant look. To keep costs near $8, stock two to five types of supplies, reusing household scraps when possible. This approach minimizes expenses while offering enough variety for creative experimentation. Consider that reusing materials like foil balloons safely can provide an unexpected source of shiny, metallic covering for a festive or celebratory napkin ring design. To extend the life of your handmade decorations, typical lifespan depends on avoiding direct sunlight and high humidity. Choose materials that reflect your personal style and complement your table setting, and you’ll be ready to assemble your custom napkin rings. For well-lit assembly photos, consider using a ring light with stand to ensure clear, shadow-free images.

Add some bling while completing your wedding reception table party decorations with these unique plastic napkin rings. In a striking solitaire engagement ring design, these 2 1/2" napkin rings feature a sparkling faux gem that is sure to light up the room. A must-have addition to your unique wedding party supplies.

Great Material: Loose leaf ring is made of iron material, strong and sustainable, Multi-layer nickel-plated steel rings prevent rusting, color unfading
Three Easy Ways to Make Napkin Rings
There are three easy techniques to make napkin rings quickly and inexpensively. The first is the beaded loop method: string beads onto a length of cord or pipe cleaner until the loop fits comfortably around your napkin, then tie the ends securely. This method allows you to mix different beads and colors to match the season or your decor style, giving you a custom look in just minutes. The second is the ribbon wrap method: cut a 12 to 15-inch length of ribbon, wrap it around the napkin, and tie it with a double knot. Trim the ends at an angle for a polished finish. This technique works well for more elegant or festive occasions, adding a touch of sophistication. The third involves creating a natural loop with twine, rope, or leather strips. Braid multiple strands for added texture, secure the ends with knots, and embellish with decorative accents like leaves or eucalyptus. For a truly premium foundation, using high-quality cloth napkins ensures your rings pair with durable, well-made fabric that won’t fray or fade. This rustic option is ideal for casual, country-inspired settings. All three methods are straightforward, take only a few minutes, and require minimal materials. For a more structured boho look, you can also create Macrame Wooden Bead Napkin Rings by stringing wooden beads onto a 10-inch macrame cord and adding brushed-out tassels for texture. For a similar warm ambiance, consider how uplights for events can transform your table setting with a soft glow. Choosing the right ring bearer pillow can similarly influence the overall aesthetic of your wedding ceremony.
Tools You Need (You Already Own Them)
You can use common household tools you already have to get started. A pair of scissors is essential for cutting cardboard tubes, ribbon, or fabric embellishments. Keep a ruler and pencil nearby to measure each ring precisely, which helps prevent wasting materials. Household glue, like craft glue or fabric glue, secures the wrap materials at the last seam for a neat finish. For faster attachment, a hot glue gun and sticks are highly effective. Paint brushes come in handy if you want to add decorative paint on cardboard bases. No special equipment is necessary—just look in your junk drawer. These simple supplies keep your project affordable and ready to use.

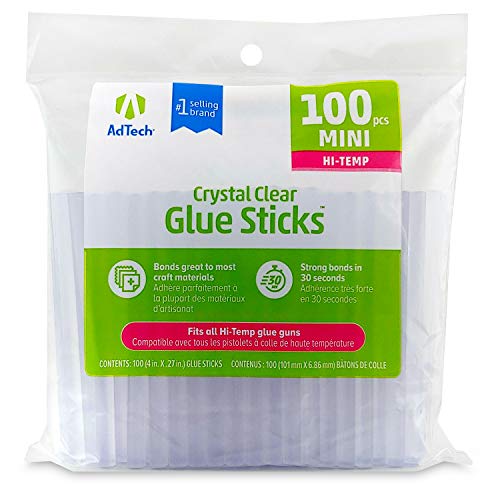
50-Pack Mini Glue Stick Multi-Pack: Versatile 0.27" x 5.7" glue sticks (7*mm-14.7mm) are compatible with most mini glue guns, enjoy a generous supply of 50 mini glue sticks to ensure you have enough room for a wide range of craft or DIY project.
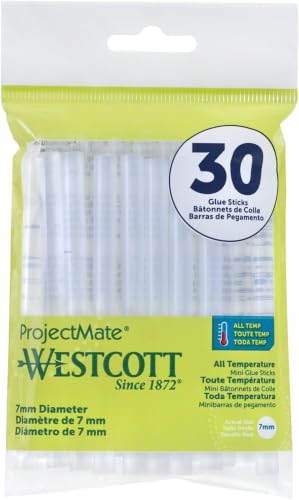
Includes: 30 mini hot glue sticks
Coastal or Rustic? Pick Your Napkin Ring Style
Choosing between a coastal or rustic style for your napkin rings depends on the mood you want to create. Coastal style is breezy and relaxed, featuring soft blues, sandy tones, and crisp whites. Use natural materials like rope, driftwood, or light wood beads to achieve a sun-bleached look. The color palette leans toward cool, calming shades that evoke ocean breezes. In contrast, rustic style offers a warm, grounded feel with earthy tones such as tan, moss, or charcoal. Incorporate leather strips, burlap, or birch bark to enhance the textured, weathered appearance. Selecting quality and value materials ensures your handmade decor lasts through multiple seasons, just like the best yard signs with stakes.
The key difference lies in the overall vibe: coastal feels airy, smooth, and lightweight, while rustic emphasizes texture, warmth, and an aged look. You can also blend both styles by combining elements like jute with driftwood for a unique hybrid. Whichever style you choose, stick to natural materials and a cohesive color palette to ensure your napkin rings complement your table setting perfectly.

【Farmhouse Napkin Rings Set of 12】Each pack comes with 12 pieces farmhouse napkin rings.The sufficient quantity is enough to satisfy your daily and party usages. Size of the napkin ring : 1.57"/ 4cm x 1.96"/ 5cm.
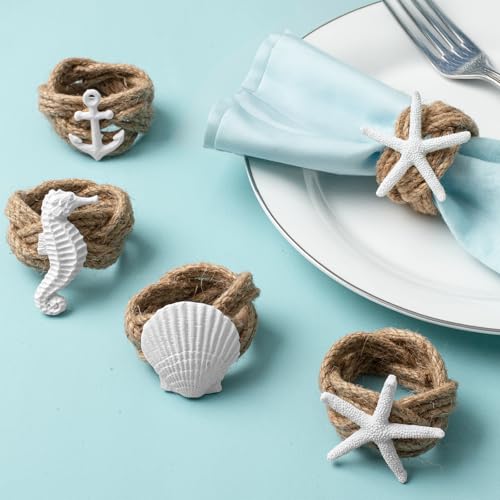
There are four different styles of napkin rings, namely starfish, seahorse, shell, and anchor. Each style has three napkin rings

【Handmade Starfish Napkin Rings】 These white starfish napkin rings are made of hemp rope and resin starfish, each one is handmade, which is cute, unique and vivid. These napkin rings coordinate well with coastal, beach, beach theme wedding, farmhouse, any outdoor or rustic indoor table setting.
Pro Tip: Let Your Napkin Rings Dry Completely
After assembling your napkin rings, allow them to dry completely before handling or decorating. Rushing this step can cause dents, warping, or cracks, as most glues and finishes take time to fully set. Typically, craft glues require 24 to 72 hours to cure completely, since they depend on a chemical reaction that needs this time to strengthen bonds. Environmental factors matter: high humidity extends curing time to 48 hours or more, while warm, dry conditions can speed it up. Applying finishes or applying thick layers of glue also delays drying. Air-dry clay needs 24 to 48 hours to dry thoroughly, and paper-roll rings generally require 12 to 24 hours. Keep each piece separated on a wire rack until it feels firm to the touch. Waiting patiently ensures your napkin rings will be durable and free of cracks or deformations.