If you’re wondering how to create a beautiful floral arch for your event, you’re in the right place. Whether you’re aiming for a romantic rounded shape or a sleek square design, the key is in the details, from choosing the right frame to layering the flowers perfectly.
With a bit of patience and the right materials, you’ll end up with an arch that looks both full and professional. Keep reading for the step-by-step process to bring your vision to life.
Choose the Right Floral Arch Frame for Your Setup
Choosing the right floral arch frame starts with matching its shape to your event’s vibe. For outdoor or beach ceremonies, round or moon-gate frames create a modern, romantic feel because their curved silhouette enhances a natural, flowing look. Alternatively, square or rectangular frames offer a clean, architectural edge that complements contemporary venues. The shape not only influences aesthetics but also impacts stability and how much floral coverage the frame can support. For example, choosing top wedding chair covers can similarly complement your arch frame by tying together the overall ceremony decor.
Material choice matters too. Metal frames, typically made from stainless steel or aluminum with a powder-coated finish, are ideal for modern or refined setups. Matte black or brass finishes add a sleek touch. Wooden frames provide a warm, organic look that suits rustic or vintage themes perfectly. Heavier steel frames support dense floral arrangements and offer greater stability, especially in outdoor settings where wind exposure is a concern. Portable frames, usually lighter, work best for temporary events. Always consider wind conditions when planning an outdoor installation to prevent accidents, and balance your venue style, floral density needs, and budget when selecting your frame. If you also need consistent lighting to photograph your finished arch, a ring light with stand can help achieve bright, even illumination. For events with children, selecting top kids’ party favors can ensure young guests leave with a memorable keepsake.

【Great Circle Arch for Any Events】Have no concepts to prepare decorating your coming ceremony? Look over here, you will get a good solution by this metal circle backdrop...
Gather Your Tools and Materials Before You Start
Gather all your tools and materials before building your floral arch to prevent interruptions. For mechanics, include floral tape, zip ties, wire, chicken wire, and pre-soaked foam blocks or cages. Hydration tools such as water tubes, buckets, and floral food packets keep your flowers fresh. Use pruning shears, snips, and wire cutters for precise trimming; ensure they are clean before use. Select seasonal blooms and greenery like roses, ivy, or monstera for affordability and reliability. Coordinate colors with focal flowers and filler stems to achieve your desired look. Remember to have transport buckets, a step stool, and gloves on hand for convenience. Optional decorations like ribbons or lights can enhance the structure without adding strain. For illuminating the arch, consider using a top rope with lights to add a soft glow without overloading the frame. Budget approximately 150 to 300 stems, with flowers costing between 400 and 800 dollars, and mechanics around 50 to 100 dollars. For a round table centerpiece, you might prefer top placemats for round tables to protect the surface underneath the arch. Complete your inventory beforehand to avoid shortages during assembly. For a different event accessory, consider reviewing the best pillow for your ring bearer to ensure a cohesive wedding aesthetic.
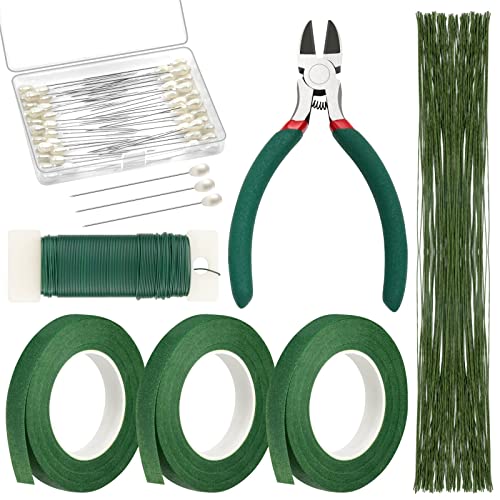
FLORAL ARRANGEMENT KIT INCLUDED – 100 pieces green stem wire 26 gauge, 114 feet green paddle wire 22 gauge, 3 rolls dark green floral tape, 50pcs corsage boutonniere pins and 1 pair wire cutter. These wreath making supplies are all you need for DIY flower arrangements, bouquets, and boutonnieres etc.
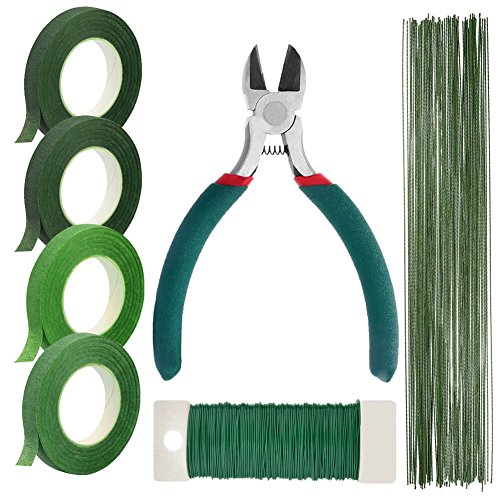
FLORAL ARRANGEMENT TOOLS INCLUDED – 100 pieces green stem wire 26 gauge, 114 feet green paddle wire 22 gauge, 4 rolls green floral tape and 1 pair wire cutter. These supplies are all you need for DIY flower arrangements, bouquets, and boutonnieres etc.

Complete Flower Bouquet Kit: Includes 4 rolls of floral tape (2 dark green, 2 light green), 200Pcs 26 Gauge floral wire stems (100 dark green, 100 light green), paddle wire, a wire cutter, and 50 boutonniere pins — essential florist supplies and bouquet accessories neatly packed in a white box.
Build a Stable Arch Base With Foam and Wire Mesh
To guarantee your floral arch doesn’t wobble or collapse under the weight of blooms, you need to build a stable base with foam and wire mesh. Start by wrapping each floral foam block snugly in chicken wire or floral mesh. Secure the mesh tightly with cable ties to prevent slipping or cracking. Attach these foam-mesh sections directly to your arch frame using zip ties, and space them evenly for balanced support. Using multiple smaller sections instead of one large block distributes the weight more effectively and reduces stress on any single point. For symmetrical designs, place foam on both sides to maintain balance. Keep each foam-mesh unit close to the frame to minimize leverage and movement. Before inserting flowers, soak the foam to keep it hydrated, which helps hold stems firmly while preventing the structure from shifting or sagging under pressure. For prolonged display, ensure the foam remains damp, as dry foam can cause flowers to wilt quickly. Trim excess mesh to create an envelope shape at the top for added stability. When working with the foam, be mindful that helium tank settings are not relevant here, but the principle of adjusting a regulator for steady flow can be compared to soaking the foam evenly for consistent hydration. To further protect your arch during off-season storage, gently pack the dried foam sections in acid-free tissue to prevent dust buildup and preserve their shape.
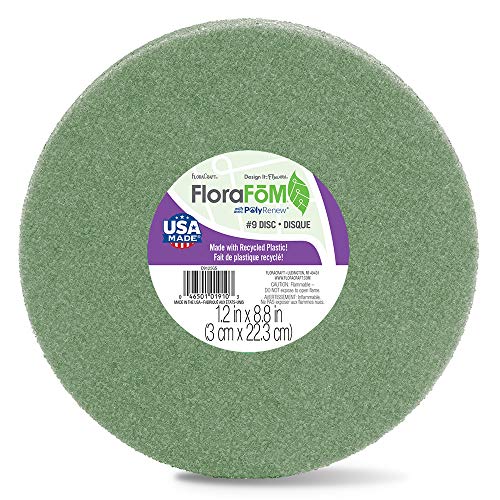
This package contains one 1.2” x 8.8” green FloraFōM disc.

1. Great Value: These are probably the most affordable floral foam blocks on the market! You can get a total of 6 blocks, each measuring 5.5"L x 3.1"W x 1.6"H. They are ideal for florists, DIY flower arrangement lovers, and gardening enthusiasts

Value Package:Includes 12Pcs floral foam, each measuring 3.15 × 1.57 inches. The perfect size for your use.Sufficient quantities will meet your daily needs
Attach a Full Greenery Base to Shape the Arch
Attach a full greenery base to shape the arch by first trimming garlands into smaller sections. This makes placement along curves easier and more controlled. Work bottom-up, anchoring longer pieces first to establish a sturdy spine. Then, tuck shorter sprigs into gaps to create a lush, full silhouette. To speed up onsite assembly, pre-install zip ties before soaking the cages.
Secure the greenery with zip ties or floral wire, hiding fasteners behind leaves for a neat finish. Angle stems between 30 and 45 degrees to follow the arch’s natural curve. Overlap layers densely to prevent gaps and ensure a solid, full look. Choose greenery shades that complement your season—muted eucalyptus for winter or vibrant ferns for summer—and check all ties as you go to guarantee the base fully defines the shape before moving on.


【Size Information】You will receive a 100PCS of green zip tie.Tie wire dimensions are Length: 6 inches,Width: 3mm.The dark green blends perfectly with natural greenery,making it ideal for gardening and outdoor use.
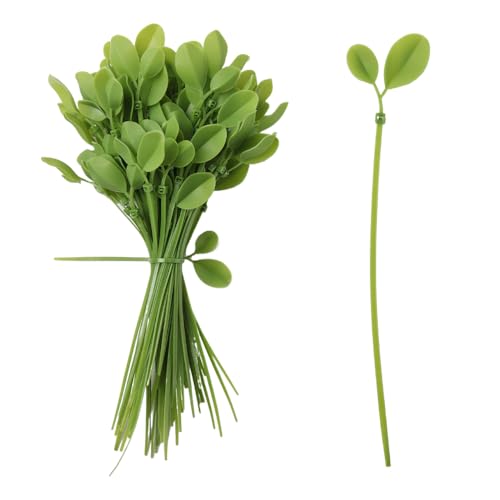
Unique Design: These nylon cable ties are designed to simulate leaf tree leaves, adding a touch of nature to your cable organization.
Layer Flowers on the Arch for a Full, Long-Lasting Look
Start layering flowers on the arch by placing your largest focal blooms first—typically garden roses, peonies, or dahlias—to serve as the visual anchor. Position these clusters at the top center or on one dominant side to create a balanced arrangement. Leave space around each large bloom to allow for medium-sized flowers, which help soften edges and bridge gaps without overcrowding. Choose hues that complement your color palette, placing medium blooms near the center of clusters and extending outward toward the edges. Then, tuck tiny filler flowers into tight spaces to smooth transitions and conceal any remaining voids. Stagger flower placement and angles to ensure that stems are inserted at least 2 inches deep into the foam for proper hydration and to avoid the eyeball effect. When sourcing materials, remember that latex balloons are not a suitable substitute for floral foam in outdoor setups, as they degrade too quickly. For a more realistic aesthetic, consider using high-quality artificial roses that mimic natural petal textures and won’t wilt. To enhance the overall cozy feel of the arch, consider incorporating soft string lights draped between flower clusters.
Create depth by varying the placement: some stems should be tucked deeper into the arrangement while others sit slightly forward. Alter the angles of your blooms so that the arch reads beautifully from different photo perspectives. Before inserting each flower, recut stems to about six inches to ensure a clean cut, which helps with water absorption. Lock each stem in place firmly without pulling repeatedly, as this preserves hydration and maintains the layered, long-lasting look.

Material: The artificial fake roses flower is made of high quality soft latex foam. Eco-friendly PE material, which is colorful, looks lifelike and has a real touch.

Material: The artificial fake roses flower is made of high quality soft latex foam. Eco-friendly PE material, which is colorful, looks lifelike and has a real touch.
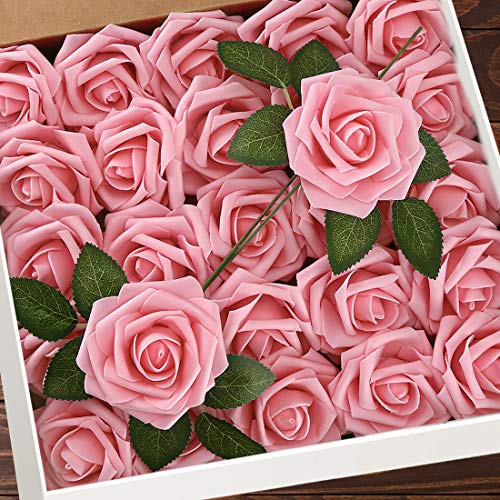
🌷 Ideal Home 🌺– Realistic roses gives the appearance of a real, natural flower. Artificial flowers are a practical alternative to real florals and will remain fresh-looking and beautiful year after year.Artificial flower is the best choice if people may allergic to flowers.
Trim Ties and Tuck Stems to Hide the Mechanics
To hide the mechanics after layering your flowers, trim ties and tuck stems carefully. Use wire cutters to cut zip tie tails flush, removing any sharp edges and visible hardware. Turn tie heads inward or tuck them behind foliage to keep them hidden. For a seamless look, use green-colored ties against leafy sections, blending them into the greenery. For outdoor arches, ensure your solar string lights receive direct sunlight daily, as they need full charging to operate reliably.
Insert stems into the chicken wire grid by trimming each stem to 6-8 inches for easier placement. Push stems into multiple openings within the grid for a secure fit. Then layer foliage over any exposed tie heads, matching your greenery to your arch’s color palette to camouflage attachment points effectively. Place the main flowers first, then tuck supporting stems around them to ensure all mechanics are covered and the design looks natural. For a balanced arrangement, consider consulting tablecloth sizing tips to understand proportional coverage. Incorporating fairy lights into the greenery can add a luminous, celebratory glow to the arch.
Inspect Your Floral Arch for Stability and Balance
Inspect your floral arch for stability and balance by first confirming the frame is plumb and level. Ensure both legs sit evenly on the ground to prevent tilting. Check the top span for lean using a visual line from front and side views; if it appears uneven, reposition or shim the legs as needed. Gently push on the structure to test for sway and wobble; noticeable movement at the joints indicates insufficient reinforcement, which should be addressed by adding extra supports or tightening fittings. Verify your anchoring and ballast—make sure the anchors are suitable for the venue surface, whether grass, concrete, or sand, and that the ballast remains centered and secure. Assess the weight distribution across the frame, balancing heavy floral clusters with lighter sections to avoid tipping. Finally, conduct a thorough safety check: look for loose fittings or hardware movement, and recheck the stability after any weather shifts or adjustments. Correct any issues that could compromise the structure’s integrity or safety, ensuring your arch remains sturdy throughout your event.