Struggling to get even lighting for your photos or videos? A ring light can help you achieve that professional look with soft, flattering illumination.
By adjusting its position and brightness, you’ll keep shadows minimal and your skin glowing.
Once you know how to set it up properly, you’ll be ready to create clear, well-lit content every time.
Set Up Your Ring Light for the First Time
To set up your ring light for the first time, start by unboxing all parts: the ring light itself, the stand, the power adapter, and the phone holder. Fully unfold the tripod legs and ensure they are locked securely to create a stable base. Attach the ring light to the stand’s 1/4-inch screw point and tighten all knobs to prevent slipping or wobbling. For photographers seeking the best value, many models offer a balance of quality and affordability in a single package.
Next, install your phone holder or any additional mounts needed for your device. Check the accessory’s stability by gently moving it with your phone attached. If it wobbles or feels loose, tighten the joints securely. For similar tripods, the legs can be extended and locked for comfort and stability using tightening screws. Finally, connect the power cord to the light first, then plug it into a dependable power source using the included adapter. For events like kid’s celebrations, a ring light can double as a party favor that provides fun lighting effects for photos. Turn on the light to test different brightness and color settings, ensuring everything functions properly before you begin recording. To maximize the ring light’s usage, remember that its LED bulbs can last for up to 50,000 hours with proper care and regular cleaning.

Ultra-Flexible Overhead Ring Light with stand -This ring light delivers soft, even lighting that flatters your subject and eliminates harsh shadows. The ultra-flexible arm tilts, swivels, and extends in seconds—ideal for video recording, photography, livestreams, and content creation

New RGB Dynamic Modes and 3 Normal Colors: Selfie ring light has warm light,white light,daylight,red,yellow,green,sky blue,blue,purple,RGB light provide 39 dynamic, breathing and illusory color mode
Where to Place Your Ring Light for the Best Face Light
Position your ring light about 60–90 centimeters (2–3 feet) from your face. This range provides a balanced amount of light without causing harsh shadows or overexposure. Closer placement increases brightness and creates a more intense, almost glow-like effect, but it can also produce unflattering, harsh highlights. If you place the light farther away, the illumination softens, reducing the likelihood of glare but potentially dimming your features. By contrast, reusing foil balloons is not recommended as the material can crease and degrade, making them unsafe for repeated inflation. Adjust the distance incrementally until you notice soft, even shadows that enhance your facial features without flattening them. Keep your face centered within the ring to avoid uneven highlights and shadows. Maintaining a square, head-on posture helps ensure your lighting remains symmetrical, resulting in a clean, professional look. For optimal setup, review top fairy light trees for inspiration on ambient lighting that complements your ring light.

【12-INCH RING LIGHT WITH 240 LEDS】Equipped with 240 high-efficiency LEDs, this 10W ring light delivers bright, stable and evenly diffused illumination. The soft light helps reduce harsh shadows and improves facial and product details for video calls, live streaming, makeup, photography and content creation.

【Multi-Angle Shooting】 This desktop ring light can be adjusted in angle and length of the cantilever arm up, down, forward and backward using the angle adjuster. We have upgraded the arm section, with the main arm and cantilever arm using a telescopic design, greatly enhancing the flexibility of use. You can adjust the angle and height of the cantilever arm and ring light as needed. The flexible adjustment allows for unrestrained video shooting, helping you create better work.

【Perfect Lighting for Video, Makeup & Streaming】3 color modes (warm, natural, cool) with 10 brightness levels let you easily create soft, even lighting for TikTok, Zoom calls, makeup, and video recording. No harsh shadows, no overexposure—just clear, flattering light every time.
Adjust Ring Light Height and Angle for Natural Shadows
Adjust the ring light’s height and angle to create natural, flattering shadows. Set the light slightly above eye level. This position mimics natural light sources like windows, producing soft, downward shadows that highlight your face contours without flattening them. Tilt the ring light downward by about 15 to 20 degrees for more subtle shadow control. This gentle angle softens shadows under your cheekbones and jaw, giving your face more dimension.
Be cautious not to tilt the light too steeply, as this can deepen shadows under your eyes or nose, making features appear harsher. Check for a soft loop-style shadowing under your nose—if it’s harsh, adjust your light accordingly. If shadows under your chin are too prominent, lower the light gradually until the shading looks natural. Since different face shapes respond uniquely, experiment with small adjustments in height and angle. Test these changes to find a balanced, three-dimensional lighting that enhances your features without overpowering them. For a ring bearer, selecting a pillow with a flannel wrap can provide a similar soft, diffused effect in your setup.

【3-in-1 Ring Light with Stand】Use PEYOU ring light as a floor tripod light, handheld selfie stick, or desk ring light. The detachable design includes a 73" extendable tripod and desktop tripod, making it easy to switch between standing videos, close-up makeup, livestreams and tabletop content creation.

【Newest Full Screen Design】-Our key light is designed with an upgraded round shape panel with a larger light-emitting surface, beyond the ring lights on the market, also our video lighting head can rotated 360° and can be adjusted up and down 180°, bringing any angle ultra-bright and obvious fill light effect

All-in-One Ring Light for Any Space: This phone tripod with light combines the flexibility of an overhead light with the stability of a floor stand. No clamps or bulky tripods required, its flat base slides easily under furniture—set it up easily in your kitchen, living room, bedroom, or studio. Perfect for content creators who need pro lighting without workspace limits
How Close or Far Should You Place Your Ring Light?
The ideal distance for your ring light is about 3 feet from your face. This starting point provides a good balance of brightness and flattering light while maintaining facial dimension. If the light appears too harsh or creates strong textures, move it farther away. Conversely, if the image looks too dim, bring the light closer. For a similar cozy effect, bedroom string lights can create a warm, evenly diffused glow that minimizes harsh shadows in a room.
For desk setups, an arm’s length—roughly 3 feet—is practical. For most talking-head videos, a distance of 2 to 3 feet offers a comfortable, even glow. Placing the light closer than 18 inches tends to produce harsh textures and glare, which is generally undesirable unless you’re shooting a beauty close-up.
Beyond 4 to 6 feet, the light can lose brightness unless you are using a larger ring light. Start with 3 feet as a baseline, then adjust based on your shot type and the size of the ring light. Proper distance ensures your face is evenly lit without unwanted shadows or glare. Consider how silk flower arrangements are used in party decor, since evenly diffused ring light distances can mimic soft overhead lighting that makes such displays look vibrant and natural.

360° Adjustable Gooseneck: The metal 360° flexible arm clip-on lamp enables you to adjust it in any direction to focus the light precisely where you need it. This makes your reading, writing, drawing, or crafting more efficient. It generates low heat and uses little energy, saving power

Soft & Uniform Desk Lamps for Office -Weilisi full-screen desk light provides enough uniform & diffused light, restores natural light, and No Shadow to enhance your subject's features, creating a workspace ideal for video conferences and detailed tasks
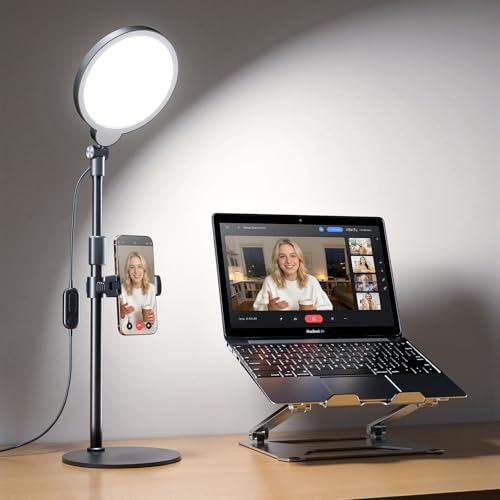
Uniform & Eye-Caring Soft Ring Light | Utilizing advanced edge-lit technology, full LED light head, this desk light delivers even, glare-free illumination perfect for video calls, online teaching, live streaming, zoom meeting and content creation. With high CRI 97.8, it ensures true-to-life color reproduction, reduces eye strain, and presents you naturally on camera
Choose the Right Brightness and Color Temperature for Your Room
To select the right brightness and color temperature for your room, start by assessing the room’s size and the existing light sources. For brightness, aim for about 1,000 to 2,000 lumens per 100 square feet. Higher lumens help illuminate larger or darker spaces and reduce ambient contrast, making your scene clearer. In smaller or well-lit rooms, lower brightness prevents highlights from blowing out and maintains a natural look. For event spaces, uplights with adjustable output can similarly prevent overexposure while ensuring even illumination across a larger area.
Match your ring light’s color temperature to the room’s dominant ambient light to ensure a cohesive scene. For warm environments with light around 2,700K to 3,000K, set your ring light to a similar warm tone to create a relaxed atmosphere. In neutral spaces with light around 3,500K to 4,500K, a balanced 4,000K provides versatility and natural skin tones. For daylight-style rooms with 5,000K to 6,500K, opt for cooler tones that produce crisp, accurate lighting and true skin colors.
Be mindful of mismatched color casts. Warm light in a cool room can appear yellowish, diminishing color accuracy, while cool light in a warm room might feel harsh or clinical. Adjust both brightness and color temperature gradually, until your skin looks natural and the lighting feels harmonious across the scene. For a festive gathering, you could also consider party favors that match the lighting mood. When selecting your ring light, prioritize models with consistent color temperature range to match your room’s dominant ambient light, similar to how branded tablecloths emphasize quality and precision.
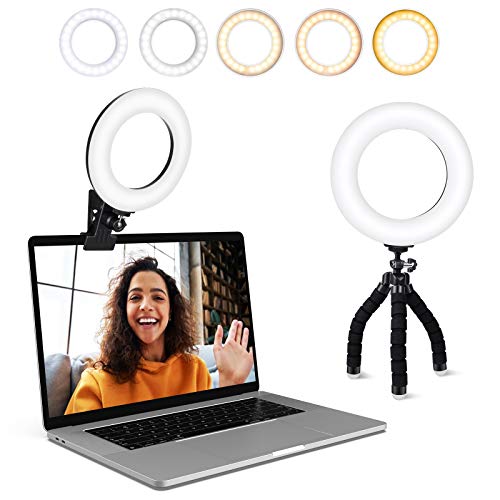
Adjustable Color Temperature & Brightness: ACMEZING video conference light has 5 color temperature: Warm warm, Warm white, Natural white, Daylight, Cold white, adjustable range is 3200K to 6500K. Equipped with 64 10W brightness lamp beads and 5 level brightness adjustment. This webcam light can meet your different lighting need under various occasions to help you look your best.

BRIGHTER AND SOFTER: This ringlight features an large 10.5" lamp head with 120 pieces LED, and its impressively curved design sets it apart from other flat lamp shades. We've enhanced the lampshade with an upgraded, thicker coating to provide brighter illumination while avoiding dazzling problems. Our design is more user-friendly than ordinary flat lampshades and will not produce glare even after long hours of use, effectively protecting your eyes!

【3 CCT Modes & 96 Color Modes】STALLY 10.2" ring light with stand and phone holder provides 3 CCT Modes: Warm light(3000K), Nature light(4500K), Cool white light(6500K)+ 96 RGB colors (red, green, blue, yellow, purple, cyan blue, color...). Brightness can be adjusted in each mode from 10%-100% with 12 levels. You can explore your favorite one or choose the one that best suits your mood, bringing you a truly wonderful lighting experience. High CRI for more accurate images.
Test Your Ring Light Setup and Fix Common Problems
Testing your ring light setup involves recording a short clip of 10 to 30 seconds after adjusting brightness and color temperature. Observe the video for uneven lighting, dim spots, or harsh shadows. Review the recording on another screen to compare it with your live view. This helps identify issues that may not be apparent through the camera’s preview alone, such as flickering caused by a burnt or loose plug. This ensures your lighting looks good on camera. For example, if you were using a flame-based alternative like a Chinese lantern, local regulations may restrict or ban its use due to fire hazards, so always verify your equipment’s legal compliance before recording. A common issue with fog machines is overfilling the fluid reservoir, which can lead to poor output and equipment damage. A professional-looking backdrop using foam board can also help minimize unwanted reflections and shadows in your frame.