Many people wonder how to create a stylish table runner without buying one ready-made. It’s easier than you might think, and with just a few supplies, you can customize it perfectly to your space.
By sewing your own, you’ll get a unique piece that reflects your style and fits your table size exactly. The full steps below walk you through the simple process from start to finish.
Supplies and Tools for Your First Table Runner
To ensure a smooth start, gather these essential supplies before cutting your fabric. First, select your fabric based on durability; quilting cotton is user-friendly for beginners, while home décor fabric offers a sturdier option that holds up well to regular use and washing. Coordinate your thread with the fabric to prevent color mismatches, and choose a heavier needle, such as size 14, especially if working with thicker materials. If you are filming a video tutorial for your project, a ring light with stand can improve lighting and production quality. For a polished presentation, consider using top rope with lights to enhance the visual appeal of your finished runner. To incorporate a similar professional aesthetic, you might also draw inspiration from arch decorating techniques for balancing drapes and greenery.
Next, consider your sewing machine. A standard machine equipped with a universal needle handles most projects effectively. Don’t forget pressing tools like an iron and ironing board to create crisp seams—these are vital for a professional finish. Also, have straight pins or clips handy to hold fabric pieces in place, a seam ripper for fixing mistakes, and a measuring tape for accurate measurements. With these supplies assembled, you’ll be ready to begin sewing your first table runner.

CREATE A FUN & RELAXED PLACE SETTING – Measures 14x108", appropriate for a table that can seat 8-10 people.
How to Measure and Cut Fabric for Any Table Size
To measure and cut fabric for any table size, start by determining your table’s dimensions at their widest points. For rectangular tables, measure from end to end for the length and side to side for the width. For round tables, measure across the center to get the diameter.
Calculate the length of your table runner by adding the desired drop to each side of the table: for example, if you want a 6-inch drop on each side, add 12 inches total to the table’s length. For a 12-inch drop, add 24 inches. Keep in mind that the runner’s width should generally be about one-third of the table’s width—a 30-inch wide table pairs well with a 10-inch wide runner. For event decor, marquee letters with balloons can add a festive touch alongside your handmade table runner. To complement your decor, consider how wedding arches provide a beautiful framing structure for tablescapes. Displaying your finished table runner’s pattern using photo booth strips in an appropriate frame can highlight your craftsmanship.
Before cutting, add a ½-inch seam allowance to both the length and width measurements, totaling 1 inch. This extra fabric ensures you have enough material for neat hems and sewing lines. Always measure carefully and add these allowances upfront to avoid mistakes and ensure your finished piece fits perfectly.
Batting Options and Simple Quilt Stitch Ideas
When choosing batting for your table runner, low-loft options like 100% cotton or 80/20 cotton-poly blends are ideal. These battings keep your piece flat and tailored. Cotton batting provides a soft, matte finish, giving your project a natural look. The 80/20 blend offers better shape retention, which is helpful if your fabric pattern requires a tidy, smooth surface. For quick projects, fusible batting is convenient because it simplifies layering and adhesion, saving you time during assembly. For a similarly tailored and stable result in other projects, consider a ring bearer pillow made with firm polyester fill. Just as you can reuse foil balloons safely by carefully deflating and storing them, you can repurpose leftover batting scraps for smaller crafts to reduce waste. When selecting party favors for a celebration, the best kids’ party favors often include items that are both fun and practical.
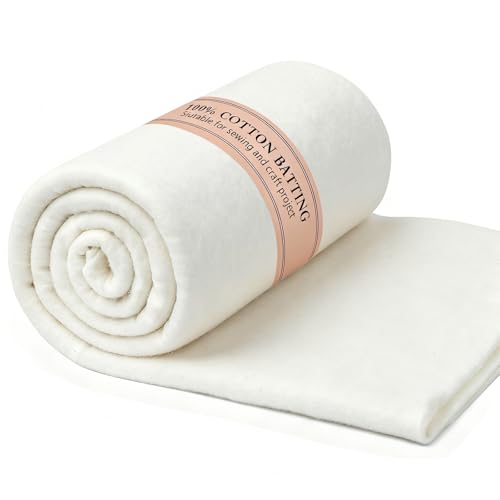
100% Natural Cotton Material for Quilting & Craft - This quilt batting is made from 100% natural cotton fibers with no additives, providing a soft, warm, and breathable foundation. It’s the ideal cotton stuffing for crafts and the perfect cotton batting for quilts, ensuring comfort in every project for all craft enthusiasts.

【Exquisite Quilt Cotton Balls】- Crafted from 100% cotton batting, our quilt cotton balls offer a natural softness and warmth that enhances the comfort of your quilts. The cotton is fluffy and resistant to tearing, making it ideal for quilting projects.

The 45” x 60” crib size is the ideal size for baby quilts, lap quilts, art quilts, and whole cloth quilts and wall hangings
Sew the Runner Body With Straight Stitches
To sew the runner body together with straight stitches, start by cutting your main fabric to the planned dimensions, ensuring proper alignment. Keep the long raw edges matched and place the right sides together. Use pins or clips to prevent shifting during sewing. Set your sewing machine to a straight stitch with a 1/4- or 1/2-inch seam allowance; choosing a longer stitch length can help reduce puckering on lighter fabrics. Sew along the lengthwise edges first, removing pins as you go. Remember to backstitch at the start and end of each seam to reinforce the stitches. Press the seams either toward the center or open, depending on your preference. Check the seam width for consistency throughout, and reinforce stress points with extra backstitching if your fabric is slippery. Finally, trim any loose threads and press the assembled body for a clean, flat finish. This method keeps the runner flat and neat by pressing seams open, which is especially helpful when using a lightweight center fabric that benefits from fusing with interfacing.

High Quality Cotton Thread: Discover the superior quality of Essential Thread by Connecting Threads, our exclusive 50-weight thread crafted from 100% triple-ply, long-staple cotton. This premium thread features a smooth, low-lint finish and a soft satin sheen that adds a touch of elegance to every stitch.


Making Sharp Corners Without the Bulk
Mitered corners are the best choice if you want your table runner to lie flat and have a professional finish. To achieve this, start by folding the hems so that the crease lines intersect precisely at each corner. Mark a 45-degree guide line to create a clean diagonal fold. After removing the fabric selvage, carefully align the folded edges, then press firmly to set the creases. First-time napkin makers often find that consistent pressing between each step prevents fabric distortion and improves accuracy.
Next, trim the corner fabric close to your marked line, leaving a small margin to prevent fraying. This step eliminates bulk and removes the bulk of stacked layers, making the corners less bulky. When sewing, place the right sides together at the folded corner, then stitch along the diagonal seam, using the intersection as your pivot point. Choose thread colors that match your fabric for a seamless finish. For silk flowers arranged on your finished runner, selecting a floral foam that holds stems securely will keep your centerpiece stable and in place.
Before and after sewing, press each folded edge to set the seams. Flatten the seam allowances away from the point and use a point turner to gently push out the corner for a sharp finish. Check for symmetry and ensure the diagonal seam lies flat without puckering. Repeat this process on all four corners to maintain consistent, crisp results.
Topstitch Your Edges for a Polished Look
Topstitching your edges is what gives your table runner a polished, finished look. Once you’ve pressed your seams and edges flat, this step is essential. Stitch about 1/4 to 1/2 inch from the edge to create a clean seam finish. Use a removable fabric marker to maintain even spacing, and guide your stitches with your presser foot’s line for consistent parallel lines. For decorative topstitching, opt for a heavier thread and a topstitching needle. Increase your stitch length to between 3.0 and 3.5 millimeters for a smoother, more professional appearance. Stitch with the fabric right side up, maintaining a steady sewing speed to prevent waviness. Start 1/2 inch from the edge, backstitch to secure the beginning, then sew smoothly along the line. At corners, stop with the needle down, pivot your fabric, and continue stitching. Pull the thread tails to the back side and tie them off neatly to ensure a tidy finish. This technique also serves as a decorative stitch that enhances the appearance and durability of the seams. For a romantic Valentine’s Day table, choose a fabric in rich red or soft pink to complement the festive theme. Consider adding warm ambient lighting like string lights to create a cozy, inviting atmosphere around your finished table runner.

★ The industrial thread and needle Best Selling Upholstery Repair Kit for Carpets, Canvas, Upholstery, Coats, Tents, Mattresses, Furs and Leather.

Universal Use for All Home Sewing Machines: Engineered with a flat shank side for perfect positioning in the needle holder and for smooth, reliable performance, SCHMETZ Topstitch Needles are compatible with all home sewing machine brands, including Brother, Janome, Singer, Baby Lock, and more

THICK WAXED THREAD: sturdy upholstery thread, 0.55mm thick and 22 yards per spool. Made from high-quality 100% polyester, ensuring excellent durability
Build a Reversible Runner With Two Fabric Layers
Building a reversible runner with two fabric layers involves stitching two pieces of fabric together so it looks polished on both sides. Start by choosing contrasting fabrics, ensuring you check the pattern direction before cutting. Pre-wash both fabrics to prevent any potential shrinking post-construction. Stack the fabric pieces with right sides facing each other, aligning all edges carefully. To prepare accurately, wash and iron fabric to prevent future shrinking and ensure smooth cuts. Keep in mind that typical LED strip lifespan is affected by heat and usage, which is similar to how fabric care impacts longevity.
If you want to add structure, insert a layer of batting between the fabrics at this stage. Pin the layers securely, leaving a 4-inch opening on one long side for turning. Sew around the entire perimeter, maintaining a consistent seam allowance—usually between 1/4 inch and 5/8 inch. Clipping the corners helps reduce bulk and creates sharper points when turning.
Turn the runner right side out through the gap, gently pushing out the corners with a blunt tool for a neat finish. Press everything flat, tucking the opening’s seam allowance inward. To achieve a clean look, hand-stitch the opening closed. This method results in a reversible runner with a polished edge on both sides, perfect for showcasing contrasting fabrics and patterns.
Recalculating Cut Sizes for Different Table Dimensions
To ensure your table runner fits correctly, you need to recalculate cut sizes based on your table’s actual dimensions. Start with the length: add your desired overhang, usually between 6 and 12 inches per end, to the table’s length. For example, a 60-inch table with a 6-inch overhang on each side requires a 72-inch runner. For the width, measure about one-third of your table’s width—so for a 42-inch-wide table, aim for a runner width of approximately 14 inches. Don’t forget to add a 1/2-inch seam allowance to these finished dimensions. If you plan to print fabric patterns, account for pattern repeat when cutting to ensure the design aligns properly. For decorative trims, add their width to your width calculation, as they will influence the final look. Always measure your actual tabletop, not just a standard size, to get the most precise results.