If your curtain lights keep falling or sagging, you’re probably wondering how to hang them securely. The key is in proper preparation and support to keep your lights in place without damage or hazards.
By following a few simple steps, you’ll ensure your lights stay up and look great. Keep reading to learn the essential tips for a safe and sturdy install.
Why Your Curtain Lights Keep Falling (And How to Fix It)
Many curtain light failures are caused by improper attachment methods. Simply sticking adhesive hooks onto surfaces without considering the environment usually doesn’t hold up, especially outdoors where wind and rain are factors. For outdoor use, screw-in hooks or nails offer a much more secure hold than removable adhesive options. Indoors, a tension rod can eliminate adhesive risks altogether, providing a stable and reusable solution. For outdoor use, the heavy duty light hooks from Hetyue are designed with double hooks and waterproof adhesive strips to secure lights up to 26 pounds on various surfaces. Choosing lights with quality and value in mind can help avoid frequent replacements. Following a correct setup order helps ensure the connections remain stable even in challenging conditions. When choosing a festive display, consider that top red lanterns often feature similar weather-resistant construction for reliable outdoor use.
Uneven weight distribution is another common issue. Space your hooks 15 to 20 centimeters apart to prevent the curtain from sagging or drooping. Pay attention to the visual appeal by choosing hooks with decorative tips that match your lights, helping them blend seamlessly into your decor. Ensure the top wire where each vertical strand meets the horizontal cable is secured properly. Misalignment causes uneven tension, which can lead to slipping or sagging over time. To avoid this, mark evenly spaced points before fastening your hooks or clips. Proper placement maintains a straight curtain line and minimizes sliding or shifting.
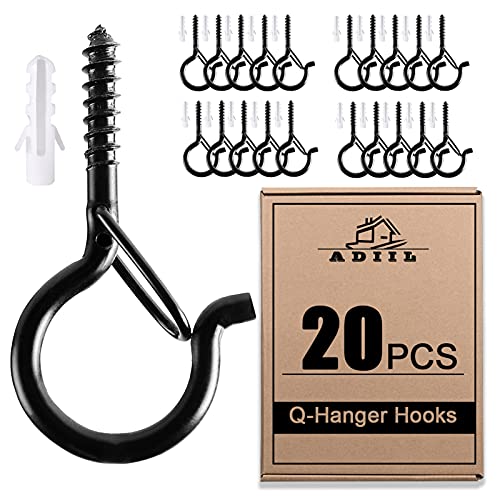
Safety Buckle Design: Add safety buckle design to prevent hanging objects from falling, even in high wind. Compared with ordinary ceiling hooks, the q hanger hooks are weatherproof and wind resistant, suitable for hanging outdoor patio string lights. No worry about items being knocked off, more secure

60 PCS Light Hooks Clips Per Box: Length 16mm/0.63inch, Width 15mm/0.59inch, Height 8mm/0.31inch; Suitable for cables with a diameter (maximum) of 5 mm/0.2 inches, size fits most wires, small size and space saving.

Sturdy & Strong:Our durable outdoor hooks are perfect for both indoor and outdoor use. Made with high-quality materials and rustproof coatings, they can hold up to 40 pounds and last for years. The outdoor light hooks are 2.2 x 1 inch, Whether you're hanging plants, lights, or decor, our hooks will securely hold them in place.
5-Minute Surface Prep for Curtain Lights
To ensure a strong bond when attaching curtain lights, dedicate five minutes to surface preparation. Start by cleaning the area with a dry, lint-free cloth to remove loose dust over a wider area than your attachment points. Dust can hinder adhesive contact, so thorough cleaning makes a difference. Next, eliminate grease and fingerprints using a 50:50 mix of isopropyl alcohol and water, but avoid touching the cleaned surface afterward—skin oils can contaminate it. Allow the surface to dry completely, as moisture weakens the bond. Inspect for flaking paint or rust, removing any if present. For materials with low surface energy, consider applying a suitable primer to improve adhesive adhesion. Finish the process with a final no-touch wipe using a clean cloth. For consistent, bright illumination during your prep work, consider using a ring light with stand to keep your hands free and ensure no missed spots. Similarly, choosing a neutral base like white chair covers can simplify matching your mounting hardware to the surrounding decor. Apply your hardware promptly after prep, before dust settles again. When attaching, press firmly for maximum contact, and always double-check your work to catch any missed spots or dust. For reusable items like hardware, ensure they are free of dust and oil just as you would when reuse foil balloons safely for reliable adhesion.

CONCENTRATION: 91% Isopropyl Alcohol solution for maximum effectiveness as a topical antiseptic and sanitizing agent

The information below is per-pack only

NO LEAKS OR CLOGS MEANS NO WORRIES WHILE YOU CLEAN. Never stop your cleaning to wipe up a leaky spritzer or break up a clog. The super strong pumps of our 8 inch, 28/400 thread misters won't quit, so you can spray endless amounts of liquids.
Adhesive, Screw, or Rod Hook for Curtain Lights
Adhesive hooks, screw hooks, and rod hooks each serve different needs for mounting curtain lights, and choosing the right one depends on your setup.
Adhesive hooks are best for lightweight, temporary indoor installations on smooth surfaces like glass or painted drywall. They are quick to install and remove without damage, making them ideal if you anticipate changing your display often. However, their adhesion weakens with humidity or frequent movement, so they are not suitable for heavy or long-term setups. For a more secure temporary hold, use VHB tapes by cleaning the surface and pressing the hook firmly for 10 seconds. A high-performance adhesive ensures your lights stay put without the risk of falling overnight. If you are worried about allergic reactions, consider using latex-free balloons as an alternative to traditional party decorations that may cause irritation. For a lightweight option that drapes well over chairs, consider spandex chair covers as a backdrop alternative to fabric that might snag on hooks.
Screw hooks offer a more permanent solution for heavier or more secure installations. They can handle greater weight and endure seasonal reuse, but you will need to drill holes into your wall which remain visible after removal. This makes them suitable for those seeking durability and stability over time. Their robust hardware is a key part of any fog machine quality comparison when considering long-term structural support.
Rod hooks are perfect if a curtain rod is already in place and can support the combined weight of the rod, fabric, and lights. They do not require any wall drilling, and when used with hooks that specify weight limits, they keep your lights centered above the window without causing damage. Just remember to treat any weight ratings as strict limits to prevent sagging or failure. For heavier light strands, evaluate the rod’s material and mounting brackets before relying on this method, since overloading can bend the rod.

No More Screwing: If you use this new hooks in ceiling or wall. For hanging plants, wind chime, lights, Xmas party decorations, safety buckle design.
60 PCS Light Hook Clips Per Box: Length 20mm/0.78inch, Width 18.5mm/0.72inch, Height 11mm/0.43inch; Suitable for cables with a diameter (maximum) of 8 mm/0.31 inches, size fits most wires, small size and space saving.

upgraded outdoor lamp clip: Large square design, the newly upgraded adhesive has ultra-high adhesion waterproof adhesive strip. The hole of the clamp is suitable for various thickness and fine lines, and there is no need to worry that the lamp clip used for outdoor light strings will fall off, easy to remove, and will not leave ugly marks on the wall.
How to Space Hooks for Curtain Lights
To space hooks for curtain lights effectively, set them 4 to 8 inches apart depending on your desired look and support needs. Tighter spacing, around 4 to 6 inches, provides better sag control and a fuller appearance, especially if the strands are heavy or hanging freely. Lighter installations can use 7 to 8 inch intervals to reduce the number of hooks and create a cleaner aesthetic. For installations using separate strings, measuring the total length from the curtain rod ensures even spacing across all sections. For added stability, you can build a DIY backdrop stand using wood or PVC pipe as a separate support structure.
Measure the full length of your installation before placing hooks. Divide this measurement evenly by the number of support points you want, ensuring that each vertical drop is properly supported and preventing uneven drooping. Start the first hook about 2 inches from the edge to keep the strands centered and avoid bunching at the ends.
Mark all support points at equal intervals prior to mounting. This ensures consistent spacing across the entire span and helps avoid adjustments afterward. Keep the end hooks aligned and spaced evenly on both sides, so that the outer strands remain taut and do not drift inward or outward over time.
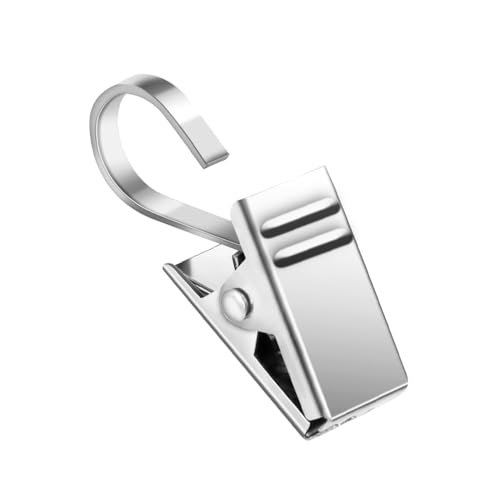
Stronger Clips With Hooks: Teenitor hanging clips are made from stainless steel, not easy to rust, strong and mighty, thickened and polished for long-lasting use. These clips are versatile and can be used for many different purposes

Military Quality: Small curtain hooks are made of 430 stainless steel with a thick black coating that adds a layer of protection to the hooks and clips, not easy to rust, can withstand serious winds and rain, indoor and outdoor use, can provide you with long-term service

Q-Shaped Buckle Design : Not like the ordinary ceiling hooks for outdoor string lights, the safety latch is added to prevent hanging objects from falling or sliding out even with vertical installation. No more worry about string lights being fall off.
How Much Weight Can Your Hardware Actually Hold?
Hardware durability determines how much load you can actually rely on. Published load ratings are maximums, not recommended working limits, so you should always include a significant safety margin. Adhesive hooks, for example, typically list a load limit of 10 to 20 pounds, but outdoor conditions like wind and adhesive aging often reduce their usable load to just 1.2 to 2.5 pounds. Screw hooks tend to handle heavier loads; a heavy-duty cup hook can support 25 to 50 pounds, and larger screw hooks can reach 150 pounds or more. The angle at which you hang also matters—a 1/4-inch eyebolt can hold 600 pounds vertically, but at just 15 degrees from vertical, that load drops to about 480 pounds. For even greater assurance, options like marine-grade 316 stainless steel eye hooks can carry up to 650 lbs for heavy-duty lifting. For curtain lights, side pulls frequently occur and can significantly lower the safe working load below the printed maximum. Always test your hardware with a conservative load before hanging lights, and prefer screw-in options over adhesives for more reliable strength.

【HIGH QUALITY MATERIAL】Made of 304 stainless steel, anti-rust, and water resistant, good for outdoor project

【Heavy duty】 This screw eye hook is specially designed for heavy duty applications and can hold objects weighing up to 30-50 pounds. It can be used in conjunction with a stainless steel ring kit, and can be screwed into walls, wood, plasterboard, PVC and other places to hang heavy objects. Very suitable for wall art, ring lights, ladder hooks, hammocks, jewelry racks, jewelry racks, light strings, wire baskets, etc.

These practical hooks are made of high-strength carbon steel, with a galvanized surface and excellent rust and corrosion resistance.
How to Tension Curtain Lights Without Breaking Wires
To tension curtain lights without breaking wires, start by using a support line that disperses the load across multiple points instead of relying solely on each individual strand. Secure a sturdy top wire or cable firmly in place, then attach each vertical strand where it meets this support line. This method prevents any single wire from bearing too much tension, reducing the risk of breakage. A similar approach to creating a paper flower garland involves using a strong base string to support the weight of multiple flowers without tearing. For a DIY solution, you can also build a simple frame or base to hold the main cable, much like assembling a balloon pump mechanism.
Adjust tension gradually by anchoring the lights at multiple points along the support line. Hook each strand at the top wire to keep the drops straight and minimize drifting. Maintain even spacing between the strands—wider gaps cause droop and increase stress on neighboring attachments. Use smooth, rounded hooks to avoid pinching or damaging the cord as you hang the lights. For added stability, consider using a support line system that distributes weight evenly like a ring bearer pillow bears a ring.
Install all supports before hanging the curtain lights. Never yank or pull the wires into position; instead, make small adjustments over time. Pre-mark support points to ensure consistent spacing and tension before applying any strain. Clip excess cord neatly to prevent unnecessary tugging. Following these steps helps the curtain hang naturally, maintaining its shape without risking wire breakage.
3 Safety Checks You Can’t Skip
Before plugging in any string of lights, perform a thorough inspection. Check for frayed wires, cracked sockets, or loose bulbs and replace any damaged components immediately—don’t wait until after hanging them. Ensure the lights bear a UL, ETL, or CSA certification mark, as this signifies compliance with safety standards. Use indoor-rated lights only inside and outdoor-rated lights outside to prevent electrical hazards. Never staple or pinch cords, which can damage insulation and cause shorts or fires. Always plug outdoor strings into a GFCI-protected outlet to minimize shock risk, especially in wet conditions.
Next, assess ladder safety before climbing. Set your extension ladder on level, stable ground and angle it at a 75 to 80-degree tilt, following the 4:1 ratio—every four feet of height requires one foot of base distance from the wall. Extend it at least three feet above your working surface for safe access. Never stand on the top two rungs, as this is unsafe and can lead to falls. If you can’t reach your target area, reposition the ladder rather than overstretching sideways, reducing the chance of tipping over.
Finally, before beginning work, carefully observe the surroundings. Look up to identify overhead power lines, and keep yourself, your ladder, and your lights at a safe distance. Test your GFCI outlet before plugging in to confirm it trips correctly in case of ground faults. Use weatherproof covers on outdoor connections to guard against moisture and corrosion, ensuring consistent safety during installation and in adverse weather conditions.
Final Adjustments to Make Curtain Lights Look Great
To make your curtain lights look polished and intentional, start by evening out strand spacing with a tape measure to ensure consistency. Recheck the alignment from multiple angles to prevent clustered sections and maintain a balanced appearance. Let the drape fall naturally without twisting, keeping it uniform from top to bottom for a tidy cascade. Position the lights behind sheer curtains to produce a soft glow, matching the LED color to your curtain undertones for a cohesive look. Center the lighting placement to create a focal point, and distribute the strands evenly so the glow appears uniform rather than patchy. Tuck any excess wire along edges and hide power cords for a professional finish. Consider using fresh flower garlands as a complementary accent to soften the overall display. Finally, step back to assess the overall visual balance, making sure the display complements nearby features like art or headboards. Avoid harsh color clashes and allow the lights to add depth without overpowering the room’s decor. For the best results, store any unused rose petals in a cool, dark place after mist-spraying them to keep them from wilting. For a larger event setup, latex balloon arches can frame the curtain lights to create a festive and cohesive backdrop.