Want to cut costs on event decor? Building your own pipe and drape system is a simple way to save money and customize the look.
With basic supplies like PVC pipes and fabric, you can create a sturdy setup that fits any space and style. Keep reading to see how you can put it all together easily and affordably.
Why Build Your Own Pipe and Drape Instead of Renting?
Building your own pipe and drape setup is cost-effective in the long run. Rental fees typically range from $8 to $20 per linear foot, which can add up quickly over multiple events. By owning your system, you eliminate recurring costs and start to see a quick return on your investment as you reuse the setup. Additionally, if your lights require power, you can apply similar simple troubleshooting techniques to fix battery box issues and keep your system running smoothly. For an even more symbolic touch, you could incorporate a unity candle into your drape ceremony setup. To ensure your lighting remains consistent and flattering across the backdrop, consider pairing your setup with a ring light that offers adjustable stand heights for optimal angles.
Ownership also offers unmatched flexibility. You can customize heights and widths to fit irregularly shaped rooms, stages, or photo backdrops. Unlike standard rental sections, which are usually fixed at 10 feet, your DIY setup allows you to create tailored configurations that perfectly match your space.
Material durability is another key benefit. You choose high-quality hardware and fabric that can withstand frequent use, unlike rental gear that often shows signs of wear and tear after a few uses. Additionally, complete control over aesthetic options means you can select colors and fabrics—ranging from simple sheers to luxurious satin or sequined materials—to match your branding or event theme precisely.
Finally, building your own system provides faster access, no scheduling conflicts, and immediate storage on-site for last-minute adjustments. This level of control and convenience streamlines event setup and enhances your overall presentation.

The Kit included 4 x Heavy Metal Base, 4 x Support uprights, 4x Adjustable Cross Bar, 4 x short straight pipes, 4 x Screw,1 x Wrench. 1 x Portable Carry Bag. Pipe and drape backdrop kit is Aluminum Stand, Durable, easy to assemble and take down.

The Kit included 2 x Heavy Metal Base, 2 x Support uprights, 1 x Adjustable Cross Bar, 2 x short straight pipes, 2 x Screw, 1 x Wrench, 1 x Carry bag. Pipe and drape backdrop kit is Aluminum Stand, Durable, easy to assemble and take down.

【Multi Application】This decoration backdrop stand is perfectly suitable for weddings, parties, birthday, baby shower, photography, photo booths, banner, pet pictures, nursing&medical partition, room decor,official divider, church , stand backgrounds, business events and so on. You can hang drapes, balloons, stage lights,pictures to make your backdrop stand amazing .
What Supplies Do You Need for DIY Pipe and Drape?
To build your own pipe and drape system, you need to gather the essential hardware components: uprights, crossbars, base plates, and spigots or base pins. Uprights determine the overall height of the setup, so choose the length based on your desired coverage. Crossbars support your drape panels and should span the width you want to enclose, so measure accordingly. Base plates provide stability and are crucial to prevent tipping; each upright requires its own base plate for proper support. Spigots or base pins connect the uprights to the crossbars and secure the structure.
For budget-friendly options, consider using PVC pipe instead of metal hardware. You will need connectors such as T-connectors and elbow connectors to attach the pipes and create corners or supports. When cutting PVC, a saw or miter box will make the process easier and cleaner.
Drape panels come in various materials. For a classic, elegant look, black velour is ideal because it creates a clean backdrop and absorbs light. Banjo cloth is a lighter alternative, providing a softer drape with less weight. Match your drape width and height to your crossbars and uprights for a neat finish.
Additionally, you’ll need a ladder to reach higher points, shot bags or weights to secure the bases, and measuring tools to ensure precise assembly. Planning an end-to-end layout and assigning a base plate to each upright ensures your pipe and drape system is stable and functional. When creating your own signage for events, refer to the tips for a neat finish from the guide on welcome signs to ensure professional-looking results.

【Multi Application】This decoration backdrop stand is perfectly suitable for weddings, parties, birthday, baby shower, photography, photo booths, banner, pet pictures, nursing&medical partition, room decor,official divider, church , stand backgrounds, business events and so on. You can hang drapes, balloons, stage lights,pictures to make your backdrop stand amazing .

【Multi Application】This decoration backdrop stand is perfectly suitable for weddings, parties, birthday, baby shower, photography, photo booths, banner, pet pictures, nursing&medical partition, room decor,official divider, church , stand backgrounds, business events and so on. You can hang drapes, balloons, stage lights,pictures to make your backdrop stand amazing .

The Kit included 2 x Heavy Metal Base, 2 x Support Sand, 2 x Cross Bar, 2 x wing nut,4 x Spring Clamps, 2 x Water weight bag,2 x Screw,1 x Wrench,1 x Carrying Case Professional heavy duty photo backdrop stand kit, Meet your party's decorative need and create a romantic and beautiful party atmosphere,Whether Indoors or Outdoors Active.
How to Assemble Your Pipe and Drape Frame
Insert the upright pin into the base hole until it feels secure, then slide the bottom pipe over it. Next, connect the top section to reach the full desired height and ensure it locks firmly in place. Repeat this process on the opposite side to stabilize the frame. Confirm that the base plates are aligned accurately for proper setup by measuring the backdrop width using the crossbar beforehand. Be aware that using a fog machine near this setup could leave a residue on the drape fabric.
Join the crossbar sections by engaging the locking button, then hook one end into the slot on the first upright. Attach the other end to the second upright. Before raising the frame, thread your drape panels onto the crossbar. Afterward, raise both uprights evenly to your preferred height, checking that everything is level. To enhance stability, add sandbags if necessary. Finally, double-check all connections before use to ensure safety and stability.

【 Adjustable upright & crossbar】The drape stand height (4.5ft-10ft) and width (4ft-10ft) are adjustable, and the twist to lock poles allow to easily change the size to fit your background

The Kit included 3 x Heavy Metal Base, 3 x Support uprights, 2 x Adjustable Cross Bar, 3 x short straight pipes, 3 x Screw,1 x Wrench. 1 x Portable Carry Bag. Pipe and drape backdrop kit is Aluminum Stand, Durable, easy to assemble and take down.

Heavy Duty Metal Base: The sturdy backdrop stand base is made of high-quality iron for excellent durability. The heavy-duty flat base (9 pounds each) ensures sufficient stability and prevents tipping over. It is more stable than a tripod.
What Causes Pipe and Drape to Fall: And How to Prevent It?
To prevent pipe and drape from falling, you must pay close attention to several key factors. First, ensure the base plates are secured tightly and add weight when setting up on uneven ground or slopes. Using heavy objects or sandbags can prevent tipping caused by unstable footing.
The height of the uprights and the span between supports also play a crucial role. Taller structures and wider spans increase leverage, making them more prone to wobbling or collapsing. Plan your setup with realistic heights to keep the load centered and stable. For wall-mounted installations, using secure grommet placement ensures the banner fabric is evenly tensioned to reduce sway.
Outdoor environments require additional precautions. Wind acts like a sail on the fabric, so reduce span lengths and use sandbags or stakes to anchor the drapes securely. For added protection, consider using outdoor curtain lights as a lightweight alternative that reduces wind resistance. Testing the stability by gently pushing on the frames before guests arrive can reveal weaknesses early. Regularly inspect all connections and ensure weight is distributed downhill on slopes. Never treat pipe and drape as a weather barrier, as exposure to elements can compromise stability. Following these steps helps avoid collapses and maintain a secure, safe setup.
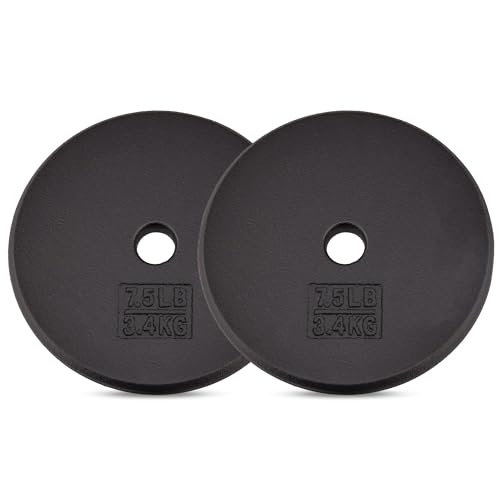
PACKAGE INCLUDES: 2 x 7.5lb
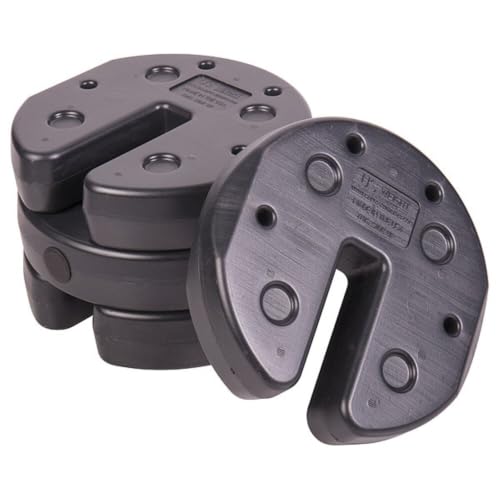
Secure tents, canopies, and umbrellas at outdoor events with these interlocking weights
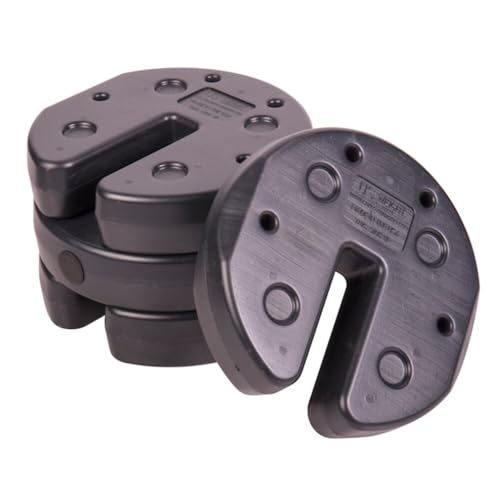
Secure tents, canopies, and umbrellas at outdoor events with these interlocking weights
Easy Ways to Customize Your Pipe and Drape for Any Event
Once your pipe and drape are securely in place, you can personalize them to suit your event. Start by selecting fabric textures that match the mood you want to create. Velvet provides a luxurious, opaque appearance ideal for formal settings. Satin offers a shiny finish that reflects light, making it perfect for glamorous themes. Sheer voile introduces softness and translucency, which works well with lighting effects—uplights can bathe it in color, while backlighting creates depth and visual interest. For a different structural option, you may want to consider constructing a DIY balloon arch stand as an alternative frame for your fabric backdrop. Next, consider mixing solid panels with printed sections featuring logos or event messaging to reinforce your branding. Adjust the fullness of your drape to influence the atmosphere: heavy gathers give a rich, formal feel, whereas flat drape offers a clean, minimalist look. Don’t overlook accessories like tiebacks or grommets, which allow you to vary how the fabric hangs. Finally, coordinate your fabric colors with your event theme to ensure your backdrop, partition, or booth wall complements your overall design and makes a cohesive statement.

Generous Dimensions: Each order includes 2 velvet drape curtains, each measuring 5 feet wide by 10 feet high. When combined, the entire backdrop measures a full 10 feet wide by 10 feet high, providing ample coverage for various event setups.

Product: This 4 piece men's smoking jacket costume includes a red robe, white captain-style hat, aviator sunglasses and a costume pipe prop for an easy coordinated retro outfit. The white shirt and black pants shown in the images are not included.

Elegant Feel and Drape: Our Sequins Stretch Velvet Fabric offers a beautiful velvet feel and elegant drape, making it much easier to work with compared to traditional velvet. The fabric features a subtle sheen that adds a touch of sparkle to any project, enhancing its luxurious appearance.