Thinking about hanging Chinese lanterns from your ceiling but unsure where to start? Getting the placement right and choosing the best hanging method can make all the difference in creating a balanced, beautiful look. Once you know how to measure, mark, and secure your lanterns properly, the process becomes simple and stress-free.
Keep reading to learn the step-by-step setup needed for a safe and attractive display.
Plan Your Lantern Layout First
Start by measuring the ceiling and room dimensions to plan your lantern layout. Record the height, length, and width to establish your usable display area. Consider furniture, walkways, and activity zones beneath to avoid obstruction. Mark the ceiling lightly with pencil to visualize your design, whether you opt for a symmetrical grid for formal settings or a clustered arrangement for a more decorative effect. Match the layout style to the room’s purpose and event tone, ensuring it complements your decorative themes and color scheme. Keep lanterns spaced 24 to 32 inches apart for even visual balance; adjust spacing based on the size of your lanterns. If layering different sizes, use odd-number groupings to create a natural rhythm. Before hanging, double-check your measurements and alignment from the main viewing angle to ensure a cohesive look. For your display lines, selecting a strong top rope can improve durability and support for heavier lantern strings. For a similar level of detail in selecting display accessories, consider consulting a guide on choosing the perfect pillow. Additionally, be aware of common wiring mistakes when integrating lighting components to prevent flickering or power loss.
Pick a Lantern Hanging Method Based on Your Ceiling
The best hanging method depends on your ceiling material. For drywall ceilings, locate a ceiling joist and drill into it with a screw hook for secure support. If no joist is available or if you’re hanging heavier items, toggle bolts can distribute weight more effectively. Keep in mind that self-adhesive hooks are only suitable for items weighing one pound or less. Wood ceilings provide the strongest support, allowing you to screw directly into the joists for reliable weight distribution. When working with plaster, find the framing behind it—do not rely solely on the plaster, as it cannot support significant weight. For concrete ceilings, use masonry anchors like Tapcon-style screws, as adhesive hooks won’t hold. Drop ceiling grids are the easiest to work with; paper clip hangers work well here, but always consider the weight of your lantern and the capacity of your ceiling material. If you are mounting directly into a joist, pre-drilling and centering fasteners prevents the drywall from crumbling under tension support. Choosing a round tablecloth that properly fits your table’s diameter helps ensure balanced weight distribution for any hanging decorations nearby. If you prefer a temporary setup, consider using a DIY photo booth kit to build a freestanding frame that avoids ceiling damage entirely. For a lightweight alternative, you can repurpose a hand-operated pump mechanism from a DIY balloon pump to create a gentle inflation tool for your lanterns.

1. Secure Lock Safety Buckle Design – Prevents Wind & Accidental Falls Equipped with a spring-loaded safety latch, these screw-in hooks securely lock outdoor string lights, plants, wind chimes, or decorations in place. Perfect for windy areas like patios, gardens, or balconies, the white safety buckle design ensures your hanging items stay firmly attached—no more falling hooks for outdoor string lights.
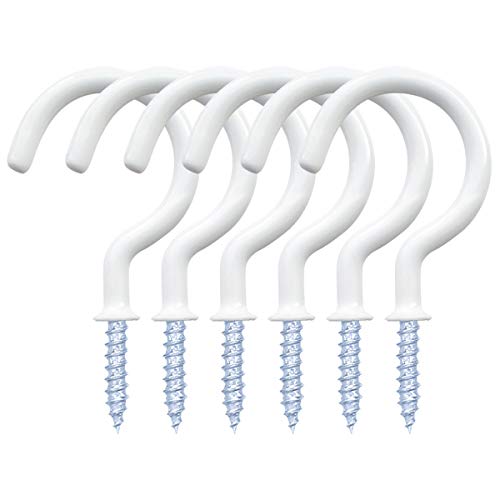
If you are fed up with the problem of easy peeling of adhesive hooks, then try this vinyl coated cup hooks

20pcs White ceiling hook set – Hang Plants, Christmas string Lights, Mugs with 20 screw hanger hook which includes 20 plastic hollow pipes with hanging hook. Make your home a heaven with these heavy duty ceiling hook. Excellent screw hooks for hanging plants & other lightweight items.
Add Attachment Points and Tie the Support Line
To add attachment points and tie the support line, start by installing ceiling hooks into joists or using rated anchors for a secure hold. Use a stud finder to locate a joist, then drill pilot holes that match your chosen hardware. Mark and space your attachment points carefully before drilling to ensure your lanterns are evenly distributed. Select the appropriate hooks—screw-in hooks for a solid grip or adhesive hooks for lighter loads—but only attach them to clean, dry surfaces. Avoid overtightening to prevent damage to drywall. For maximum strength when mounting into a stud, use the regular screw to attach the hook directly. For lightweight silk flowers that may accompany your lanterns, consider floral foam blocks to anchor stems without adding excess weight to the line. If you are instead using LED strip lights to illuminate the lanterns, choose heavy-duty double-sided tape for a secure, residue-free hold that matches the hooks’ reliability.
Once your hooks are securely installed, tie your support line to each hook using simple, snug knots like a loop or slipknot. Make sure the knots are firm enough to hold but not so tight that removal becomes difficult later. Some hooks feature a slot designed to keep the line seated, adding extra stability. For even illumination and balanced weight distribution across the line, consider how light quality and performance affect the final visual result. Hang your lanterns from the support line, allowing a slight sag to create a natural drape. Before fully relying on the setup, gently tug each hook to test its stability.

【Unlock Overhead Display Space】 Peel-and-stick hooks turn unused ceiling space into a display for hanging plants, string lights, wind chimes, paper lanterns, and lightweight decor. Save floor and tabletop space while styling your living room, bedroom, window area, or entryway.

CEILING HOOKS KIT: 90 Pack 6 sizes white screw-in ceiling hooks. 20Pcs 1/2 inch, 20Pcs 5/8 inch, 20Pcs 3/4 inch, 10Pcs 7/8 inch, 10Pcs 1 inch, 10Pcs 1 - 1/4 inches. Enough quantity to meet your use and replacement needs.

👌PREMIUM CEILING PLANT HANGER - Made of heavy-duty steel construction that won't rust over time, featuring anti-slip coating makes these plant hooks for wall extremely sturdy and perfect hanging hooks heavy duty up to 50 lbs.
Measure and Cut Your Support Lines for the Perfect Drop
Start by measuring your ceiling height accurately. Calculate the desired drop length for your fixtures, accounting for the lantern dimensions, clearance, and the bottom height you want the lanterns to hang at. When working with sloped ceilings, measure both the highest and lowest points. Subtract the total of your desired bottom height, clearance, and lantern body height from the ceiling height at each point to determine the ideal line lengths. For a lasting display, consider that silk flowers offer greater durability over real blooms, which wilt quickly. Just as tablecloths were historically used to protect surfaces from spills and stains, your support lines should be secured to prevent lanterns from slipping. If you are using latex balloons instead, note that latex balloons typically last only 12 to 24 hours when filled with air, and helium-filled balloons deflate even faster due to gas permeation.
Cut each support line to this calculated length, adding a small allowance for knots to account for any shrinkage or slipping. For a staggered look, vary the lengths—such as 2 feet, 1.5 feet, and 1 foot—to add visual interest. Verify clearance by ensuring lanterns are at least 12 inches from walls and 24 inches apart, which prevents obstruction and maintains balance. Before hanging, double-check that the lowest lantern remains above head level for safety and convenience.

WHAT WILL YOU GET - You will get 2 pcs wall mount ceiling mount pipe support. The height of the bracket can be adjusted from 50 mm to 100 mm. Pipe support clamp is suitable for pipes with a diameter of 25mm-27mm (3/4inch). At the same time, we have equipped you with 6 screws, screw size is 24mm/0.95inch, 6 mounting anchors and a small hexagon wrench.

Product Type: Wall-mounted ceiling bracket designed for the fixing of pipes, tubes or rods, suitable for pipes with an outside diameter of 1/2 inch.

Symbolic Embroidery: Low profile cap with a Thin Blue Line flag, symbolizing support for first responders and public safety officials.
Hang Each Lantern and Check for Stability
To hang each lantern securely, use a ceiling-rated hanger designed for the weight. Make sure it is centered so the body hangs level and balanced. Give the lantern a gentle downward tug to verify that the support is stable and secure. Look for any signs of sagging, tilting, or rotation, which indicate uneven loading. If the lantern shifts, stop and double-check your fastener before proceeding. For a more rustic aesthetic, consider using a natural wood branch as a decorative hanging rod.
For safety, never rely solely on drywall anchors for heavy loads; opt for toggle anchors or locate a joist for added strength. Avoid using string or thin twine as primary supports, as they lack durability and safety. To ensure an attractive display, center the weight so the lantern remains stable and the bottom stays level. When installing multiple lanterns, space them evenly to prevent crowding or contact. After hanging, wait a few minutes and inspect again for settling or cracks around the fixture. Remove the lantern immediately if you notice strain or instability to maintain safety and aesthetics. For festive events, consider including photo booth props to add interactive fun alongside your lantern display. Similarly, you can reuse foil balloons safely by checking for leaks and reinforcing their seals before a second use.