Want to create your own foam machine but not sure where to start? Building a simple one at home involves a basic PVC frame, a submersible pump, and a powerful leaf blower.
With the right mixture of soap and water, you’ll be able to produce thick, stable foam for your next event or fun day. Keep reading for a straightforward step-by-step to get you started.
How a Foam Machine Works
A foam machine turns liquid into mountains of bubbles through a combination of fluid dynamics and air manipulation. In mechanical foam systems, a pump pushes a diluted surfactant solution through a fine mesh or nozzle, where a fan introduces air at high speed. This shears the liquid into countless tiny spheres, which quickly stabilize thanks to surface-active ingredients that form film walls around the bubbles. The result is a dense network of foam that can be sustained as long as the surfactants keep the bubble walls stable. For a simpler, low-cost approach, you can build a wood backdrop stand to support your foam nozzles and hoses. To ensure a clean and professional setup, you can also construct a foam board backdrop to shield surrounding areas from overspray. A quality ring light with a stand can provide consistent illumination for filming your foam machine in action.
Some foam machines use chemical reactions instead. They precisely meter two reactive components, such as isocyanate and polyol, which mix at the nozzle. This chemical blend reacts instantly, releasing a blowing agent that produces carbon dioxide gas. The expanding gas inflates the foam from within, creating a thick, stable foam structure. Whether using air entrainment or chemical reactions, controlling flow ratios, temperature, and nozzle design is essential to achieving the desired foam density and consistency.
What You’ll Need to Build Your Own Foam Machine
To build your own foam machine, you’ll need several key components. Start with a high-powered fan or leaf blower to disperse foam effectively. A water pump and foam nozzle are essential for shaping and directing the foam output. For plumbing, gather a hose, PVC pipe, connectors, and clamps to set up a stable system. Use a large trash can or barrel as your reservoir to hold the foam solution.
Your foam solution should include dish soap or baby shampoo for the base, with added glycerin or J-lube to create thicker, more stable foam. Water is a fundamental ingredient, and corn starch can be added to increase foam persistence. To customize foam color, opt for biodegradable foam concentrate or experiment with safe additives. Ensure your fan is securely mounted using the proper backdrop stand setup to maintain a stable and upright position during operation. Necessary tools include a drill with a ½-inch bit for assembly, a shutoff valve for control, and a mesh screen to act as a foam-forming membrane. Secure all components with ratchet straps and duct tape to ensure stability during operation. After building, you can reuse foil balloons to test airflow patterns before committing to a full foam run, as they are lightweight and easy to position in front of the fan. When selecting a pillow for your ring bearer, consider the top options reviewed to find the right fit for your ceremony.

680 CFM HIGH POWER AIRFLOW: Experience powerful outdoor cleaning with a 680 CFM cordless leaf blower equipped with an advanced axial flow fan and high-speed motor. The strong airflow quickly moves leaves, grass clippings, dust, and debris from lawns, driveways, patios, garages, and other outdoor areas.

STRONG BLOWING: 12 Amp electric blower delivers up to 600 CFM and 110 MPH for clearing leaves and debris from lawns, driveways, patios, decks, and walkways.

Durable Components for Reliable Performance:Featuring imported high-speed bearings, a precision CNC metal turbine, and a hand-wound brushless motor, this mini turbo jet fan is built to deliver consistent, long-lasting performance
Step 1: Build a Stable PVC Frame
Stability is crucial when building a PVC frame because you’re working with high-pressure foam, and any wobble could lead to tipping or joint failure. Use 1-inch Schedule 40 PVC for the frame to ensure rigidity and strength. Start with a wide, low footprint—making the base rectangle wider than the top reduces the center of gravity and minimizes tipping. Shorter uprights decrease leverage and side sway, adding to overall stability. Reinforce every corner with tees or cross fittings, and drill and bolt critical joints to prevent rotation. Incorporate diagonal bracing to eliminate racking, and support horizontal rails longer than 4 feet with mid-span braces. Anchor each vertical point by driving rebar 12 inches into the soil or using sandbags on hard surfaces. Finally, fasten all connections tightly so the entire frame functions as a single, solid unit, and for extra enjoyment, set up a party favor station nearby so kids can grab themed trinkets while the foam machine runs.

Size - Length of each: 17";The 1 inch Schedule 40 PVC pipe has an outer diameter of 1.315 inches and an inner diameter of 1.02 inches. This PVC pipe is suitable for various DIY projects.Please confirm before purchase.

Size - Length of each: 17";The 1 inch Schedule 40 PVC conduit pipe has an outer diameter of 1.315 inches and an inner diameter of 1.02 inches. The pipes are also widely used in DIY, cable sleeves, etc.Please confirm before purchase.

DIMENSIONS: Precise measurements of 1.315 inches outer diameter and 1.049 inches inner diameter for accurate fitting and installation
Step 2: Connect the Pump, Hose, and Reservoir
To ensure reliable foam system operation, the pump, hose, and reservoir must be properly connected. Submerge the pump in your reservoir to keep its intake consistently fed, but make sure to keep the water source separate from electrical components to reduce shock risk. Use a flexible, clear suction hose rated for both vacuum and pressure for durability. Attach the hose tightly to the pump inlet using appropriate fittings, then secure all connections with clamps to prevent leaks. Use standard fittings for hoses to simplify the setup. Use a soldering iron to securely attach any electrical connections for the pump. For additional safety, treat the banner or backdrop area as a warning zone to keep connections dry during setup. When choosing components, it helps to consider what defines the best rope with lights for outdoor durability, as similar weather-resistant principles apply to foam system hoses.
Route the hose away from moving parts and hot surfaces, keeping it as short and direct as possible to maintain optimal flow. Position the reservoir so the pump can draw fluid without pulling in air, which can reduce output. Support the hose to prevent strain on connections and avoid accidental disconnections.
Testing the system before full use is crucial. Pump water through the lines to check for drips or bubbles, ensuring all joints are sealed tight. Keep cords dry and away from moisture to prevent electrical hazards. Proper connection and maintenance of these components are essential for consistent foam delivery and system longevity.
Leading Manufacturer Of High-Quality Products

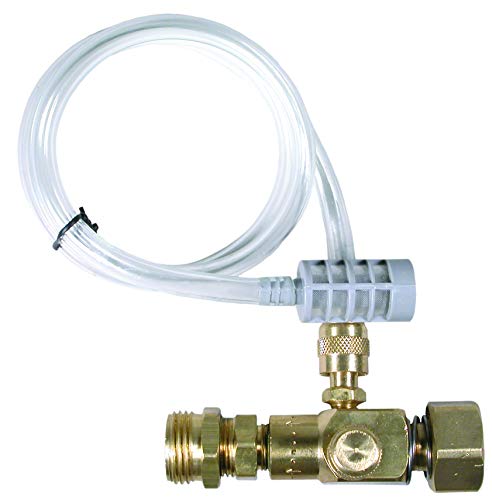
Features 3ft of durable plastic hose for extra reach

Accessory Hose for Deluxe Food VS-12 Vacuum,containers canisters wine stoppers, jar sealers and the quick Marinator, Doesn't require any additional adapters
Step 3: Position the Blower for Maximum Airflow
Position the blower so its discharge faces the foam outlet, ensuring maximum airflow reaches your foam nozzle. Keep the intake fully open to draw in the greatest amount of air and minimize turbulence by aligning the blower in a straight line with the foam stream. Place the unit on a firm, level surface to reduce vibration and maintain proper alignment. As with crafting a hanging flower garland, it is important to keep all elements properly spaced and untangled for the best visual effect.
Maintain unobstructed space around the intake and exhaust ports—nothing should block airflow or cooling. Keep the hose run short, straight, and match its diameter to the blower outlet to prevent bottlenecks. After setting everything up, test the system: a weak airflow indicates poor blower placement or a blocked intake. Reposition the blower until you achieve a direct, unrestricted air path for maximum efficiency. As with hanging lights, positioning for direct airflow is key to achieving the best results. For a secure setup, use cable clips or ties to fasten the blower hose, reducing movement and maintaining alignment.

Replacement 2 PK Air Filter. Replaces OEM # ECHO 13031006560.

Deep Cleaning Technology of the Watch Cleaning Kit: Exclusive Micro-Foam Technology: Ultra-fine foam penetrates deep into the gaps of bracelets, cases, and bezels, powerfully dissolving sweat stains, oil, and dust without damaging the items, leaving them looking brand new

It's replacement part but not genuine
Pick the Best Foam Recipe for Thick Bubbles
To achieve thick, stable foam from your machine, use a well-balanced solution with a high soap-to-water ratio. Start with about 1 part soap to 4 or 6 parts warm distilled water. Concentrated dish soaps like Dawn or Fairy are ideal because they create better foam consistency compared to diluted soaps. Incorporate glycerin at roughly 1/3 cup per 4 cups of water; it helps strengthen the bubbles and slows evaporation, resulting in longer-lasting foam. Stir gently to prevent breaking the bubble film. For added visual appeal, mix in a few drops of water-based dye—this won’t affect the foam’s density. Avoid thin or watery soaps, as they produce weaker bubbles. A syrup-thick solution provides the richest foam. Allow the mixture to rest for a few minutes before use to maximize foam stability, and then you’ll be ready to generate thick, lasting bubbles. For best results, choose a top-rated dish soap known to produce consistent foam in bubble machines. For a neat finish, consider how floral wire stems can be used to secure decorative elements around your machine, similar to attaching flowers to a wedding arch. Using a professional balloon pump ensures you can quickly inflate the foam bubbles without losing their shape.
Step 4: Test Your Machine and Adjust Foam Output
To test your foam machine output, direct the nozzle into a safe collection drum and activate it. Run the foam stream for 60 seconds, noting the moment the flow stabilizes. Measure the collected foam to determine the volume and calculate gallons per minute. Repeat this process twice to ensure consistency. Ensure the foam has the correct expansion ratio, much like achieving the right sparkle density with champagne sparklers. A consistent foam output also depends on the nozzle alignment being properly secured to avoid uneven spray patterns. Proper maintenance, including checking the fluid’s shelf life and storage, ensures consistent performance over time.
Make small adjustments to the foam output. If the foam flow is weak or collapses quickly, increase the air pressure. If the foam is too wet or heavy, reduce the pressure. After each change, check the nozzle to confirm the stream remains steady and uniform without sputtering. Weigh the foam to verify its density matches your target expansion ratio.
Record the final pressure setting, test duration, and measured output for future reference. Ensure all valves are returned to the normal operating mode. Regular retesting helps monitor variations and maintain performance over time.
Why Your Foam Is Weak or Uneven (And How to Fix It)
Low pressure caused by clogs or worn components is a common reason for weak or uneven foam. Check nozzles, filters, and hoses for blockages from dried soap or debris. Equipment maintenance is crucial—replace worn pump seals and clean proportioners regularly to maintain steady pressure. Using warm water to activate the soap helps ensure proper foaming, and matching the gas-liquid ratio is essential for consistent results. Fixing these issues will help you achieve thick, even foam every time. For memorable events, confetti cannons provide a reliable burst of color.

Direct fit for John Deere Gator XUV 590i, 625i, 825i (2011-2017) and RSX 850i/860i (2013-2017) models. SKU: HFP-367-T

Also Available with EPR elastomers for use with Glycol--Search K141-1-EPR

Use silicone grease to delay rot and clogging.
How to Operate Your Foam Machine Safely
To operate your foam machine safely, start by ensuring electrical safety. Use a grounded circuit protected by a circuit breaker or fuse and match the outlet voltage to your machine’s specifications. Always disconnect the mains power before filling or servicing the machine to prevent electrical shocks. Keep all cords dry and away from foam spray to avoid short circuits or electrocution. Position your machine on a flat, hard surface with at least 50 centimeters of clearance on all sides, and keep it away from any flammable materials to reduce fire risk.
Supervising the foam zone continuously during operation is essential for safety. Wet foam can be very slippery—always wear anti-slip footwear and prevent people from running in the area. Adjust foam density carefully by following the manufacturer’s recommended fluid guidelines; avoid using unapproved products, as they can cause malfunctions or safety issues. If foam reaches electrical components or gear, stop the operation immediately. Before each use, inspect all cables and controls for damage or wear. Follow the manufacturer’s startup and shutdown procedures exactly to avoid electrical hazards. Once shutdown procedures are completed, keep safety staff present until the floor is completely dry to prevent slips and falls. Following these safety steps helps protect everyone involved.