Want to craft your own paper fans on sticks but unsure where to start? It’s simpler than you might think and doesn’t require fancy tools or complex steps.
With just some sturdy paper, glue, and a stick, you can create a beautiful, functional fan in minutes.
Keep reading for straightforward instructions that will turn you into a DIY fan maker.
Gather the Right Paper, Glue, and Stick Handle
To gather the right paper, glue, and stick handle, start by selecting sturdy paper such as cardstock or construction paper to ensure your fan maintains its shape through repeated use. Choose decorative paper that reflects your personal style, and pay attention to matching colors with your décor or outfit for a uniform look. For the handle, opt for a popsicle stick or wooden skewer; these are easy to customize with paint or washi tape to coordinate with your paper. Use a glue stick or hot glue for quick and clean assembly, avoiding messy liquid glues that may cause warping or uneven bonding. Keep scissors on hand for trimming excess paper, and use a ruler and pencil for precise measurements. To keep everything secure while the adhesive dries, have binder clips ready to hold your pieces in place. For a similar approach to selecting materials, consider the perfect pillow for your ring bearer. When choosing a tiny gift bag for your completed fan, look for top party favors that match the recipient’s interests. For consistent lighting while photographing your finished fan, a ring light with stand ensures even illumination without harsh shadows.

Black Orange Party Hanging Decorations include: 6 pieces paper fans in 3 different sizes and 14 pieces swirl decorations, 20 pieces in total Halloween Party Hanging Paper...
Cut and Score Your Paper for Even, Accurate Folds
To cut and score your paper for even, accurate folds, follow these steps precisely. Start by measuring and marking your fold lines with care. Use a ruler to place small reference dots along the line, then connect these dots with a straightedge for a clear guide. Keep the sheet square and ensure the corners are aligned to prevent any drifting during cutting or scoring.
Trim clean edges before you start scoring. A sharp blade, guided against a firm straightedge, will give you smooth, even edges and prevent ragged cuts that could interfere with your folds. When scoring, use a dull bone folder or a similar tool to create a light, controlled crease without cutting through the paper. Apply steady, gentle pressure from end to end; avoid puncturing or cutting the paper. For heavier stock, make two moderate passes instead of one to deepen the fold line without damaging the paper. Creating a crisp, clean edge is essential for the professional appearance of your finished fan. For temporary event signage, similar attention to detail ensures durable and attractive floor decals that withstand foot traffic. For projects like party decorations, reusing materials safely can extend their life without compromising quality.
Always score on the inside of the fold to produce cleaner creases and minimize surface cracking. After scoring, fold gradually along the line, using your fingers or a bone folder to create an even crease. Finally, burnish the fold with firm pressure, which helps sharpen the crease and ensures a smooth, professional finish. Proper cutting and scoring are key to achieving perfect pleats and crisp folds.

WONVOC BONE FOLDERS KIT: a versatile collection of bone folders for all your paper crafts and bookbinding needs. This comprehensive set includes 4 pieces of bone folders, in 2 different shapes and sizes
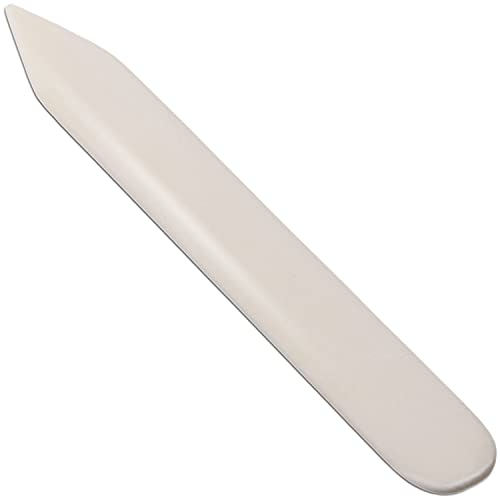
Genuine Bone Construction: Real bone folder made from 100% cattle bone for bookbinding, leather and paper crafts with dimensions of approximately 6 inches x 0.8 inches x 0.2 inches

Preumium Material: Bone folder is made of premium plastic, smooth, lightweight and durable, and it won't damage your paper, card, and leather.
How to Accordion-Fold a Paper Fan Into Pleats
Begin by folding your paper in half to establish a clear center line, which serves as a guide for even pleats. Press down firmly along the first creases to create a crisp fold—this initial step helps prevent the pleats from shifting unevenly as you work. Once folded, reopen the paper and start folding one side toward the center line, then alternate directions on each subsequent fold to form a zig-zag pattern. Aim for pleats measuring between 1/2 to 3/4 inch; smaller pleats result in a tighter fan, while larger pleats produce a looser look. Be precise with each fold, matching the edges exactly to ensure uniform pleats. To keep the pleats sharp, reinforce each fold with your thumbnail or a bone folder. Avoid weak creases, as they can cause uneven spring in the finished fan. Continue folding until the entire sheet compresses into a dense stack, with the side profile resembling a “W” or “M.” Before releasing the fan shape, double-check that all pleats align properly for a neat and even accordion fold. The technique of holding the fold down firmly with one hand while creasing with the other ensures consistent alignment and prevents slipping during the process. This handmade fan can serve as a creative and budget-friendly party favor for kids’ celebrations. For a more polished look, consider attaching the paper fan to a simple wooden dowel using strong adhesive tape. Just as helium latex balloons require careful handling to prevent premature deflation, maintaining sharp and uniform pleats here ensures your fan holds its shape longer.
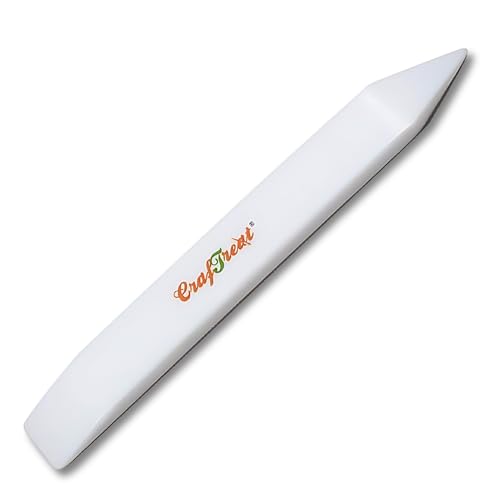
CRAFTERS ESSENTIAL: You will be amazed to see this Teflon Bone Folder becoming an indispensible craft tool among your Bookbinding supplies , Card Making Supplies, paper crafting supplies ,Leather Crafting Tools and Supplies.

🦴 It's workable for leather craft, bookbinding, burnishing and paper craft. 6" x 0.8” x 0.22” inch.

7PCS Per Set: 4 bone folders, 1 large push pin, 1 hook weeder, 1 metal book ring to collect 4 bone folders to prevent loss. The four bone folders include 1 standard paper scorer or origami folding tool, 1 small tool with a knife-like shape, 1 large with a pointed tip, and 1 curved tail bone creaser with curved edge. The holes on each one make them more unique which can be put on a key ring
Assemble and Reinforce the Center Seam of Your Paper Fan
Align the two folded halves so their center creases meet precisely at the fan’s midpoint. Keep the edges even to prevent twisting at the seam. Proper center seam alignment ensures the fan opens symmetrically. Before applying any adhesive, press the seam area flat. Use a thin line of glue on one side, then bring the halves together. Press firmly, holding the fan closed until the bond sets. For a sturdier hold, you can apply pressure with a balloon arch’s structural logic, which relies on tension and even distribution to keep the formation stable. For outdoor use, choosing waterproof materials can help the fan withstand moisture and remain durable. For a natural look, consider using realistic artificial roses to add a decorative accent to the fan’s center seam.
For reinforcement, add a narrow strip of paper or tape along the interior side of the center seam. This extra backing stabilizes the join, helping the fan stay tight and reducing wobbling over time. You can also place a small circular cover over the seam to conceal it and add strength. Let the adhesive fully dry before opening the fan. Reinforcing the seam makes your fan more durable and helps it stay evenly balanced.
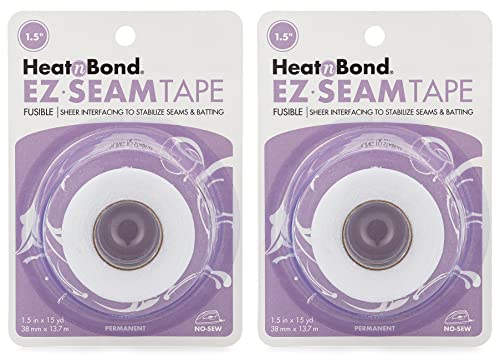
2 Packages - each package contains 1 roll 1.5 inches wide x 15 yards for a total of 30 yards

Size Details: Our fusible interfacing tape is 2 inches wide, providing ample coverage for joining interfacing pieces of various sizes. Each roll is 40 yards long, giving you enough ironing seam tape for multiple projects.

Sweet scrapbooking design with paper scraps, washi tape, flowers, lace, scissors, ribbons and the phrase Paper Scraps Are My Love Language.
Attach the Stick Handle to Your Paper Fan for a Strong Grip
Apply a generous layer of adhesive to the top end of the stick, ensuring the contact area is evenly covered. This full coverage is essential for a strong joint, preventing the connection from failing under stress. Use a high-quality structural glue or hot glue that dries quickly and offers strong bonds—avoid weak decorative glues that lack load-bearing strength. Press the handle firmly onto the edge of the paper fan and hold it in place until the adhesive sets completely. Enhancing this grip, wrap a piece of card paper around a pencil to form a cylinder for the handle. For a more secure bond, clean the stick surface with a dry cloth to remove dust before applying glue, as removal of debris ensures maximum adhesion similar to preparing silk flowers for cleaning.
Insert the stick as deep as possible into the paper fan. Deeper insertion increases the surface area of contact, which enhances load transfer and overall stability of the handle. Make sure the stick is aligned straight for an even, secure fit that can withstand regular use.

Fast Preheating - 20w glue gun features a fast 1 minutes warm up time; Infused with a PTC ceramic heating system, mini hot glue gun heats up and releases glue within 1-2 minutes and then keep the temperature constant automatically

【Fast Heating】This mini hot glue gun heats up and releases glue within 1-3 minutes, fits φ0.27inch(7mm) glue sticks(Please note that the size of the hot glue gun and sticks set is small, please confirm the size of the glue gun and glue stick before purchasing).

CORDLESS - This glue gun can be used cordless for up to 2 minutes. Simply lift the glue gun off of the heating stand for use, then place the glue gun back on the heating stand to allow it to reheat.
Decorate With Cutouts and Patterned Paper: or Solve a Wobbly Handle
To decorate your paper fan with cutouts and patterned paper effectively, start by attaching the stick securely to prevent wobbling. Once the handle feels stable, focus on decorating the fan body. Use patterned scrapbook paper as the base, aligning the patterns at the seams to create a seamless look. Coordinating colors between your paper and cutout embellishments helps unify your design. Add decorative cutouts, such as circles or stars, after folding the paper to hide seams and reinforce the center. For a broader scene, consider using background stickers and adding messages like “I love you” to enhance the theme. For a polished finish, cleanly cut the acrylic with a straight edge to avoid rough edges.
If the handle wobbles, the issue is usually weak adhesion. Improve stability by increasing glue coverage where the stick meets the fan body. Consider adding a small medallion or extra layer of cardstock at the joint for additional support. Make sure to let the fan dry completely before handling to avoid shifting or detachment. Proper glue application and strategic pattern placement will keep your fan both visually appealing and sturdy.