Thinking about hanging Govee curtain lights but not sure where to start? The key is measuring your space correctly and preparing a stable setup.
It’s all about choosing the right length, cleaning the surface, and following best practices to keep everything secure and looking neat.
Keep reading to learn the essential tips for a lasting, clutter-free installation.
Measure Your Window Before Buying Govee Curtain Lights
Before purchasing Govee Curtain Lights, measure both the width and height of your window, not just the glass area but the entire mounting space. Knowing the window width helps determine if a single 4.9 ft panel will fit or if you need a larger size. The standard curtain is approximately 4.9 ft wide, so wider windows require the 9.8 ft or 14.8 ft options. Height measurement is just as important; the 6.6 ft drop will influence how the curtain hangs. For example, a 5 ft by 5 ft window may have the lower portion hang below the visible glass. Use a tape measure and record both dimensions carefully before checking against product specifications. Doing this prevents gaps or excess pooling, ensuring your curtain looks intentional and well-fitted rather than makeshift. For events, step and repeat backdrops are often used in a similar way to create a professional photo area. For a truly cozy ambiance, consider how the curtain’s light output compares to other bedroom string lights reviewed for warmth and soft glow. If you want a more professional lighting setup for photography, ring lights with stands offer similar control over brightness and color temperature for your videos.
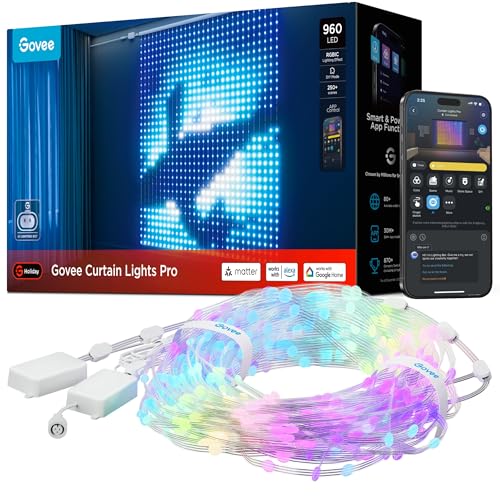
Smoother, Silkier Animations: Featuring 960 ultra-dense RGBIC LEDs and a next-gen 20x-speed chip, the smart curtain lights support high-capacity 2000KB animations for vastly more complex, detailed, and clearer visual effects

RGBIC Lighting Effects: Explore a vibrant rainbow of colors with 16 million color options and a lighting effect depth of up to 100 cm. Use your smart string lights to adorn your space with endless combinations you can easily customize.

Visualized Patterns and Smooth GIF Display: Enjoy super-rich and expansive images made possible via 520 lamp beads, each with a 20 × 26 pixel arrangement for enahnced animation and GIF output 200KB resolution compatibility(Non-splicable)
Clean the Wall So Your Govee Lights Stick
To ensure your Govee lights stick securely, start by preparing the wall surface where the adhesive will be applied. Remove loose dust and debris with a soft cloth or brush to enable better contact. Degrease the wall using a mild detergent diluted with water or wipe with isopropyl alcohol on a lint-free cloth, especially on smooth surfaces. Avoid harsh chemicals that could damage your paint or finish.
If the wall has a rough or porous texture, additional prep is necessary since these surfaces reduce adhesion. Ideally, smooth surfaces will create a stronger bond. Make sure the wall is completely dry before applying the adhesive—moisture can weaken the grip. Once mounted, press the lights firmly against the surface to maximize contact and ensure lasting adhesion. For similar installations, reviewing top LED strip lights can help you compare adhesion and mounting options for your ceiling project. Proper cleaning and surface prep are key to keeping your Govee lights securely attached over time.

WALL-MOUNT WIPE HOLDER: Made for use with the iDesign Wipe Dispenser (sold separately) as well as most standard store-bought wipe canisters between 3.25" and 4.25" in diameter

Large Wipes Holder: Holds major large wipe brands such as Clor*x Wipes(75 Coiunt),Lys*l Wipes(80 Count) & more – Suitable for cylindrical containers up to 4.1" in diameter.

1.VERSATILE ADHESIVE REMOVER: Our wipes adhesive remover is specially formulated to remove stickers, decals, tape residue, signs, glue, stickers, labels, grease, paint and more. It works on a variety of surfaces including cars, glass, metal, plastic, vinyl, debris, walls, appliances, ovens and more.
Pick the Right Govee Curtain Light Size
To pick the right Govee Curtain Light size, start by measuring your target area’s width and height. Standard V1 lights are approximately 5 feet wide by 6.6 feet high, making them suitable for smaller spaces or accents. Curtain Lights 2 come in three widths: 4.9 feet, 9.8 feet, and 14.8 feet, all at a height of 6.6 feet. Match the width to your window or wall span—4.9 feet is ideal for narrow or compact areas, while 14.8 feet accommodates larger walls or expansive window setups.
Check the number of LEDs as a sizing hint; higher counts indicate denser resolution and more detailed lighting effects. The 520-LED model suffices for simple patterns and general lighting, whereas the 1,560-LED size offers a broader canvas and more intricate displays. Consider how the size aligns with your decor and the visual impact you want to achieve. Additionally, larger panels tend to have a more cohesive look when used as backdrops, so think about the overall style.
Power consumption is another factor—bigger models with more LEDs use more energy, so ensure your outlet can support the load without overloading circuits. When choosing, balance size, LED density, and power needs with your visual goals and available space. For a cohesive aesthetic, consider the ring bearer pillow as a decorative accent that complements your lighting setup.

Visualized Patterns and Smooth GIF Display: Enjoy super-rich and expansive images made possible via 1560 lamp beads, each with a 60 × 26 pixel arrangement for enahnced animation and GIF output 200KB resolution compatibility.

Package Includeds:20 pieces spacers for Govee curtain lights,keeping your string lights from tangling.

6974316999881
Choose Your Mounting Method: Adhesive, Hooks, or Nails
Choose adhesive hooks for smooth, clean, dry indoor walls, as they offer damage-free removal. They are ideal for lightweight setups and won’t leave holes. Press each adhesive hook firmly for at least 10 seconds to ensure a strong bond. However, they weaken on textured, damp, or rough surfaces, making them unsuitable for such areas. For a festive outdoor celebration, you might also consider top birthday yard signs as an alternative focal point. Opt for hooks when you want evenly spaced, removable support on indoor walls. Using multiple hooks helps distribute the weight across several points, reducing sag. This method allows for easy removal without damaging your wall. For outdoor or high-exposure locations, nails provide a more secure attachment. Nails grip firmly and resist movement, but they do leave visible holes. Always match your mounting method to the surface: adhesive hooks on smooth surfaces, nails where extra stability is needed. Avoid relying on a single fastener; instead, secure with multiple attachment points for better stability. If you plan an outdoor celebration, remember that sparklers are illegal in Massachusetts, so check local laws before adding them to your decor. For events requiring floral touches without maintenance, silk flowers offer a durable and versatile decoration alternative to fresh blooms.

【Multifunctional EZlifego Nano-tech Tape】- By using the most advanced nano-technology, made of the latest acrylic gel material, our heavy duty two sided adhesive tape has incredibly strong adhesion and excellent durability. The excellent solution to all your DIY mounting project.

Strong Hold — No Drilling Needed: Want a strong hold without putting holes in your walls? These 3.15” × 1.18” (8 × 3 cm) heavy-duty adhesive hook-and-loop strips keep flashlights, under-cabinet lights, tools, décor, and accessories securely mounted on smooth, sealed surfaces—no nails, screws, or surface damage required. Works well on metal, glass, tile, plastics, and sealed or painted non-porous wood or concrete.

【Slide Groove Design】Our wall hooks adhesive feature snap fastener for easy movability, convenient installation and removal, ideal for hanging and organizing power outlets, picture frames, wall pictures, and decorations.
Hang Govee Curtain Lights Straight Without Tangling
To prevent Govee curtain lights from tangling easily, avoid lifting the entire bundle at once. Instead, lay the set flat on a clean floor and keep each vertical strand separated. Lift one section at a time to reduce knotting and steer clear of rough surfaces that can twist the wires. For a neat look, maintain consistent spacing from top to bottom, matching the bottom spacing to your top rail. Secure both ends: fasten the top rail first, then anchor each strand’s bottom to prevent wind from crossing over the strands. Installing mid-span supports with clips or ties helps keep the lights stable and prevents sway in breezy areas. Using a balloon tying tool on pump can help secure these supports quickly without straining your hands. This method mimics how wedding guest book audio recordings capture clear sound without background interference. When managing cords, work through knots slowly from one end without pulling hard, and route excess cable away from the hanging area to keep the strands straight and untangled. Proper cord management ensures your lights stay neat and easy to adjust. For a dust-free installation, first clean silk flowers with a gentle brush and low heat to avoid transferring debris onto the lights.

Package including: 25pcs stainless steel curtain clips with hooks,strong, very handy and practical little hangers with excellent quality!
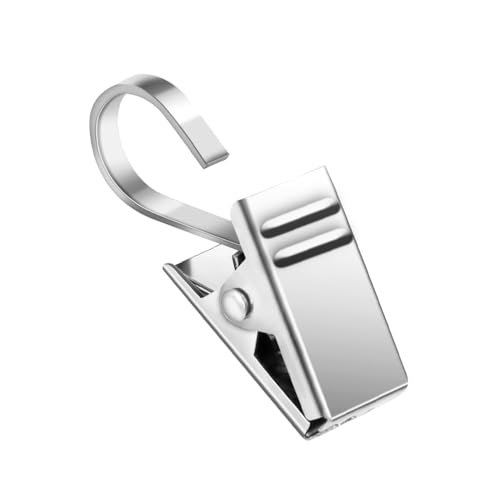
Stronger Clips With Hooks: Teenitor hanging clips are made from stainless steel, not easy to rust, strong and mighty, thickened and polished for long-lasting use. These clips are versatile and can be used for many different purposes
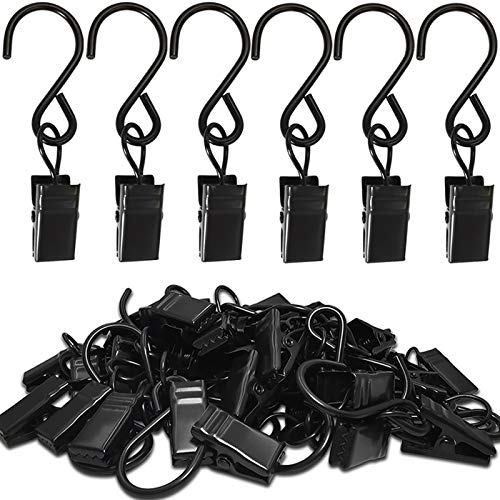
PACKAGE INCLUDES: 50 stainless steel S hooks with curtain clips for hanging party lights and seasonal decorations. A versatile set for home decorators, party hosts, campers and craft enthusiasts
Test Each Strand Before You Secure the Cords
Before securing any cords, test each strand while the control box and power adapter are still accessible. Plug in the control box and power adapter first, then turn on the set to verify every light string illuminates correctly. This step ensures you can identify any dead sections, flickering bulbs, or incomplete starts before they become harder to access. Check for damaged wires, loose connectors, or abnormal behavior during this initial test. Make sure all segments respond properly to controls or preset modes, confirming they function as intended. Treat your rose petals as carefully as your lights, as consistent spacing and moisture control are key to keeping them fresh and beautiful. Remember that LED lifespan can vary based on how long each strand runs daily and the surrounding temperature. A common mistake to avoid is rushing the test before verifying every connection.
Next, straighten each strand to ensure the layout matches your curtain pattern, and verify the lamp beads face forward with consistent spacing. Confirm the entire string lights up uniformly and behaves normally during the test. If you find any faulty strand, replace it immediately to avoid issues later. Do not fasten cords into hooks or clips until the entire curtain passes this on/off test successfully. Re-test after moving the control box or adapter to confirm the setup remains functional. Once all strands pass the test, you can safely proceed with securing the cords securely in place.
Stop Govee Curtain Lights From Blowing in a Draft
To prevent Govee curtain lights from blowing in a draft, start by reducing airflow exposure. Keep the lights away from fans, vents, and open doors to minimize movement caused by drafts. Then, make support adjustments to eliminate sway. Use clips or twist ties at the top and bottom of the strands to secure them in place. Adding mid-strand stabilization with adhesive hooks or a mesh backing can also help prevent billowing. For any indoor setup, avoid using indoor fog machines, as they can coat the lights in residue and create a fire hazard. Mount the lights to a rigid surface like a rail or wall hooks for a tighter, more stable arrangement. Finally, secure the edges first to tighten the overall layout, then straighten and evenly space the strands. Reinforce any loose sections because they are most prone to movement. Each curtain string is 5 feet wide with lights spaced 3 inches apart, so ensure the support points align with that spacing for full coverage without sagging gaps. Following this approach keeps your curtain lights flat, steady, and free from drafts.
Hide the Power Cord and Control Box Cleanly
To hide the power cord and control box cleanly, start by planning your route before mounting. Map out the shortest, neatest path to your outlet to minimize excess slack and reduce visual clutter. Proper storage is important because sparklers do expire and can become less reliable over time if not used within a reasonable period. Use cable management tools like tuck-in slots or clips to secure the wire adaptor behind the back shell, keeping it out of sight. For exposed sections, employ concealment options such as paintable cord covers or wire loom to seamlessly match your wall or trim color, which are easy to install and allow for a neat finish. Connecting LED strip lights requires verifying the polarity and connector alignment to ensure a secure fit before finalizing the setup. Position the control box behind furniture, within a soffit, or behind plants to keep it hidden yet accessible for future adjustments. For outdoor installations, place the control box and power supply inside a hard plastic weatherproof box with rubber grommets facing outward to prevent moisture ingress, ensuring reliable operation over time. Ensuring these elements are properly managed results in a tidy look without sacrificing convenience.
Fix Uneven Strands and Sagging Points After Hanging
To fix uneven strands and sagging points after hanging your curtain lights, start by re-leveling the placement of each strand. Mark consistent top and bottom endpoints on the wall or support structure for each vertical strand, then match each to a common height reference. Ensure that the drop distances are uniform—adjust any strand that starts or ends lower than the others. Use a level tool to verify that all strands are aligned horizontally across their span, preventing any noticeable tilting or unevenness.
Next, add more support points at the first sign of sagging, not just at the ends. Place extra clips at regular intervals along the top wire to distribute tension evenly. For wide runs, include a central support clip to split the span, which dramatically reduces drooping and keeps the strands straight. When tensioning the strands, be gentle—do not over-stretch or pull too tight, as this can stress the connectors or distort the overall pattern. Instead, straighten strands slowly, and then refine their alignment. For a more secure foundation, consider using double hook designs that prevent sagging and swaying while allowing adjustable height for optimal display. Choosing a tablecloth for round tables can similarly benefit from even tensioning to avoid wrinkles and droops. Creating your own helium tank requires careful attention to pressure regulation to ensure safety and consistent output.
To correct minor sags, adjust hooks in small increments and secure each strand at the drop point with fixed-position clips. This prevents rotation or shifting. If the ends drift outward or downward, add attachment points near those areas to pull them back into alignment. Straightening techniques, such as laying the lights flat to remove twists and allowing strands to relax, can improve natural hang. Once adjusted, step back and inspect from a distance to spot any hidden unevenness or remaining sags. Regularly check and tighten support clips to maintain a smooth, uniform appearance over time.