Wondering how to hang paper lanterns safely and beautifully? You’ll want clear instructions on assembling the lanterns, installing hooks securely, and adjusting the hanging height to suit your space.
With a few simple steps, you can create a charming, festive atmosphere without any fuss. Keep reading to learn all the easy tips for perfecting your setup.
Essential Tools and Supplies for Hanging Paper Lanterns
To hang paper lanterns securely, gather essential supplies including ceiling hardware, mounting tools, lighting components, and basic accessories. Use clear fishing line for an almost invisible suspension or ribbon for a decorative touch. For light indoor displays, adhesive hooks work well, but for stronger hold, screw-in hooks are more reliable. Match your mounting hardware to your ceiling type: magnetic hooks suit metal ceilings, while crocodile clips are ideal for tents or fabric canopies. To light your lanterns, opt for battery-operated or remote-controlled LED tea lights, which stay cool and safe. For photographers seeking a consistent and adjustable light source for their setups, consider using a ring light with stand to test different lighting effects. Keep a ladder, scissors, and a ruler handy for precise placement and even spacing. Planning your color scheme beforehand will help create a cohesive look. Extra fishing line and spare hooks allow for easy adjustments and replacements, ensuring your display looks perfect once set up. You can also extend your decor’s lifespan by learning how to reuse foil balloons safely for future events. For a whimsical alternative, you can craft paper fans on a stick following a simple folding method that takes just minutes per fan.

PACKAGE INCLUDE: Anezus fishing line comes with 1 roll of 0.3 mm 131 yards clear fishing cord that are perfect for hanging decorations and beading supplies

Fishing Wire Value Pack – Comes with 1 roll of 0.45mm 220yds/200m fishing line clear, long enough for party supplies to decoration and hanging ornaments

1. Clear Fishing Line Wire Size: You will get 230 m/755 ft, 0.45 mm/0.018 in fishing Wire
Open and Assemble Your Paper Lantern Correctly
To assemble your paper lantern, start with an undamaged shell and a clean, flat surface. Handle the paper gently; squeezing can cause punctures. Carefully pull the wire frame apart until the lantern takes on a rounded shape—stop once it reaches its intended size to avoid overstretching. The bracket’s flat part is inserted into the top of the lantern to begin securing the structure. Next, insert the internal expander through the top opening, feeding it until it protrudes below. Align the center of the expander with the frame and lock it into the eyelets to keep everything secure. Check that both hooks engage fully so the frame won’t slip out. Finally, rotate the lantern to evenly space the panels and verify that the top and bottom openings are clear. When grouping lanterns for hanging, coordinate colors by grouping similar shades together. For a polished effect, choose a soft polyester ring bearer pillow to complement your theme. To create an aesthetically pleasing display, space the lanterns at varied heights, which adds visual flow. Do not install hooks yet—focus solely on the assembly process.
Install Ceiling Hooks Specifically for Paper Lanterns
To install ceiling hooks for paper lanterns safely, first identify your ceiling material. For wood, drill a pilot hole and then screw in a heavy-duty hook. For outdoor use, consider how curtain lights can similarly define a space when attached between hooks. If you have drywall without a stud behind it, use a toggle bolt to secure the hook. Concrete ceilings require masonry anchors. Adhesive hooks are suitable only for very light lanterns and work best on clean, smooth surfaces. For a lasting finish, periodically dust silk flowers with a soft brush or blow-dryer on a cool setting. Always choose a hook compatible with your ceiling type and ensure it can support the weight of the lanterns you plan to hang. For more secure outdoor installations, use plastic clips along the hook line to prevent the rope light from sagging. Proper installation minimizes the risk of falling lanterns and guarantees safety during your display.

Strong Adhesive: Our newly upgraded adhesive has a super high adhesion waterproof adhesive strip, which has been repeatedly tested by us to solve the problem of falling ornaments. Easy to remove, will not leave unsightly marks on the wall, can replace traditional nails or liquid glue.
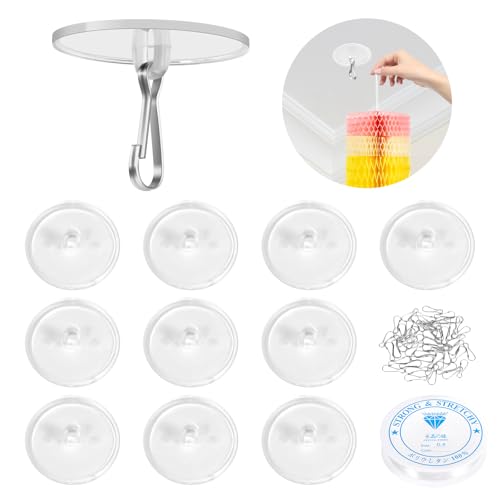
AFFORDABLE SET: Includes 10 non-marking ceiling discs, 10 metal hooks, and 80ft of fishing line. Sufficient quantity to meet your versatile decoration hanging needs, with a nearly invisible look when in use.

【Unlock Overhead Display Space】 Peel-and-stick hooks turn unused ceiling space into a display for hanging plants, string lights, wind chimes, paper lanterns, and lightweight decor. Save floor and tabletop space while styling your living room, bedroom, window area, or entryway.
Choose and Cut Hanging Line for Paper Lanterns
Choose an appropriate line length by measuring the distance from the ceiling to where you want each lantern to hang. Add an extra 2-4 inches to each measured length for tying knots and slack. This ensures the lanterns hang at the desired height and are easy to secure without strain.
Use a ruler or measuring tape to determine the exact length needed for each line. For horizontal arrangements, measure the room span and decide whether you want lanterns at varying heights or evenly spaced. Always account for clearances over walkways or furniture to prevent sagging or obstruction. For a consistent outdoor display, consider using durable weatherproof string lights that match the lanterns’ atmosphere.
When cutting the lines, select sharp scissors or utility knives to make clean cuts and minimize fraying. It’s best to pre-cut all your lines before hanging. This keeps the installation process smooth and ensures uniform lengths, helping your display look tidy. For a cohesive aesthetic, consider how top wedding chair covers can complement your lantern arrangement with matching color schemes.
Leave extra length beyond your measurement to facilitate tying knots and adjusting the height. A typical allowance is about 2-4 inches, depending on the thickness of your line and knot size. Proper measurement and cutting are key to achieving a professional, balanced look for your lantern display. Similar to how sparklers use specific metal powders to create bright colors, precise cutting ensures a clean, vibrant end result.

Halloween Decorations: Cute Pumpkin decor Halloween lantern string lights perfect for Halloween tree, Cosplay parties, mantel, porch, outside entryway, garden, patio or yard.

【Vibrant Festive Brilliance】:10 multicolor flower garlands radiate cheerful hues from warm white bulbs, creating a joyful, bohemian party atmosphere. Perfect for energizing wedding receptions, birthday celebrations, Christmas trees, or adding playful charm to garden pathways and vibrant porch displays.
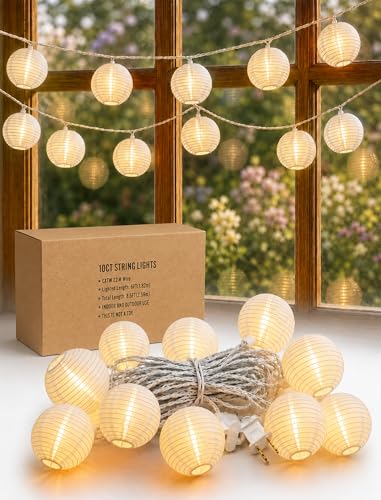
[UPGRADED NYLON FABRIC, CLASSIC LOOK] Enjoy the timeless beauty of white paper lanterns without the fragility! Our lantern string lights are crafted from premium, weather-resistant nylon cloth rather than easily torn paper. These mini paper lanterns provide the authentic, elegant glow of a traditional paper lantern lamp, but are significantly more durable for long-term use.
Attach the Line to the Lantern’s Top Hook or Loop
You should attach the line directly to the lantern’s shell only if the built-in top hook or C-loop is damaged or unavailable. Otherwise, always use the designated hardware for rigging. The built-in top hook or C-loop acts as your main anchor point and is designed to distribute weight evenly. To secure the line, form a loop and hang it over the hook or slip the cord through the fixed loop and tie it tightly. Avoid threading anything through the paper itself to prevent tearing. Using a crisp, wrinkle-free finish approach to the line can help keep the lantern’s surface smooth and undisturbed.
Proper attachment ensures balanced weight distribution, preventing tilting or swaying. Use a snug lark’s head knot to keep the lantern level. After tightening, trim any excess tail to avoid unnecessary slack. Always test the connection gently before raising the lantern to confirm it’s secure. Loose knots can cause the lantern to sway, tilt, or drop unexpectedly. If the connection feels weak, retighten the knot. For extra security against wind, use double knots inside the noose to hook both the bottom and top parts of the lantern. Relying on the built-in hardware reduces stress on the delicate paper shell, protecting your lantern during display or flight.
AFFORDABLE SET: Includes 50 non-marking ceiling discs, 50 metal hooks, and 160ft of fishing line. Sufficient quantity to meet your versatile decoration hanging needs, with a nearly invisible look when in use.

【Simple Solution】: Add bright light to the place where no lamps, or you need overhead lighting, with on-off switch, you don’t have to plug and unplug to control bulb each time. This plug-in pendant light cord is also a nice socket for custom projects, make your room lighting more creative.

AFFORDABLE SET: Includes 20 non-marking ceiling discs, 20 metal hooks, and 80ft of fishing line. Sufficient quantity to meet your versatile decoration hanging needs, with a nearly invisible look when in use.
Hanging Multiple Lanterns at Even or Staggered Heights
For the best visual impact, arrange multiple lanterns at either even or staggered heights depending on your desired look. For a clean and balanced appearance, keep the centers of the lanterns spaced about 24 to 32 inches apart, using each lantern’s diameter as a guide to prevent crowding. Leave at least 6 inches of space from walls to avoid a cramped effect. Using a professional balloon pump ensures quick and consistent inflation for all your lanterns, saving time and effort during setup. For safety, always position lanterns away from heat sources and avoid using them near open flames, as paper is highly flammable—a key ring light safety precaution that applies to any illuminated decor.
If you prefer a more dynamic and layered arrangement, stagger the heights and vary the line lengths. Creating a cluster with different heights adds visual depth and interest. A popular approach is forming a triangle shape with three lanterns: one placed higher as the focal point and two lower to balance the composition. The tallest lantern should serve as the anchor for the grouping. For a cohesive party theme, consider coordinating these arrangements with selected party favors that complement the overall decor.
Color coordination also plays a key role; select hues that complement your existing decor or make a bold decorative statement. Always measure and mark the suspension points before hanging, and place the lanterns temporarily to test the layout visually. Keep the overall arrangement proportional to your space so it enhances rather than overwhelms the room.

WITHOUT WIRE AND BULB:You will receive a 20-inch handcrafted linen lampshade, which is more durable than paper lanterns and will not tear easily.Inspired by Isamu Noguchi's paper lanterns, this design replaces paper with linen—eliminating the risk of tearing while better aligning with minimalist and naturalist home aesthetics.

【Product Specifications】The white small paper lanterns measures approximately 12 inches by 12 inches (30 cm by 30 cm), providing a versatile size suitable for various lighting fixtures and decorative needs. This chinese paper lanterns features a classic round shape and a white finish, offering a clean canvas that complements any interior design style. Note: This product is a lampshade and does not include a light bulb.

🔹▶️Simple Solution: Add bright light to the place where no lamps, or you need overhead lighting, with on-off switch, you don’t have to plug and unplug to control bulb each time. This is also a nice socket for custom projects, make your room lighting more creative.
Why Battery-Operated Lights Are Safer Than Open Flames
Battery-operated lights are safer than open flames because they eliminate the fire risk associated with candles. Paper lanterns are highly flammable, and a real candle’s flame can ignite the material in seconds. LEDs produce almost no heat, keeping your lanterns cool and preventing the material from catching fire. This reduces the risk of burns during setup and minimizes worries about sparks near curtains or children. Since flameless lights run without ventilation and can operate for hours, you don’t need to constantly monitor them or worry about accidental fires if they are knocked over. For a cohesive event setup, you can incorporate these lights into a wedding arch to create a unified, fire-safe design. When selecting flameless options, look for top party favor ideas that include LED lights for a coordinated and safe celebration. These modern lighting solutions also offer adjustable brightness levels, which let you tailor the ambiance to match different event phases, from a soft glow during dinner to a vivid wash for dancing.